


The Al Mizan .NET Start Page provides quick access to windows, records, database information, program tips, prayer times and tasks. It helps users review pending work, open task settings and address warnings that may affect their work or database.
Enable the Start Page: #
Open Tools and select Show Start Page, as illustrated below.
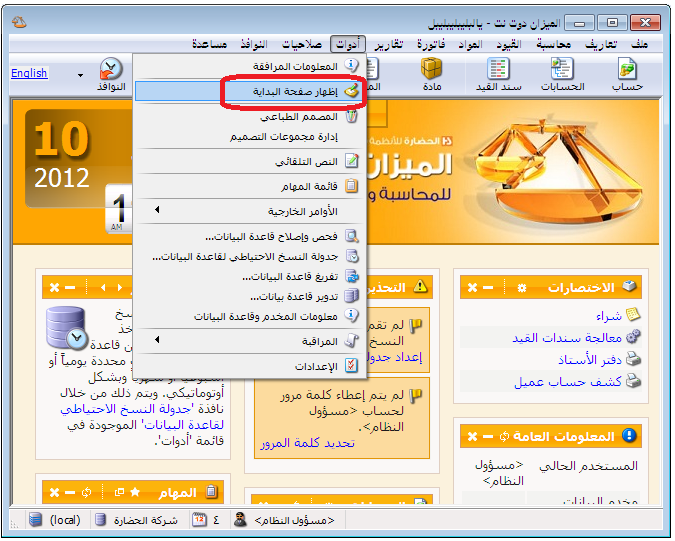
.
Alternatively, open Tools, Settings and Start Page, then enable Show Start Page, as illustrated below.
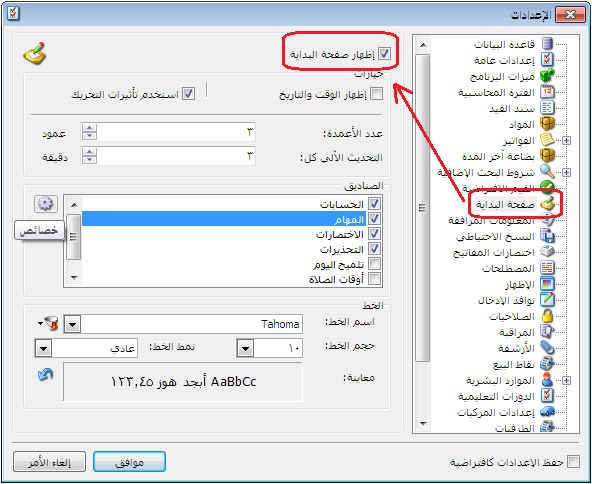
.
See Start Page in General Settings.
Configure General Start Page Settings: #
The settings window contains the following:
Show Start Page: Enable this option to display the Start Page.
Show Time and Date:Enable this option to show the time and date at the top left of the Start Page, as illustrated below.
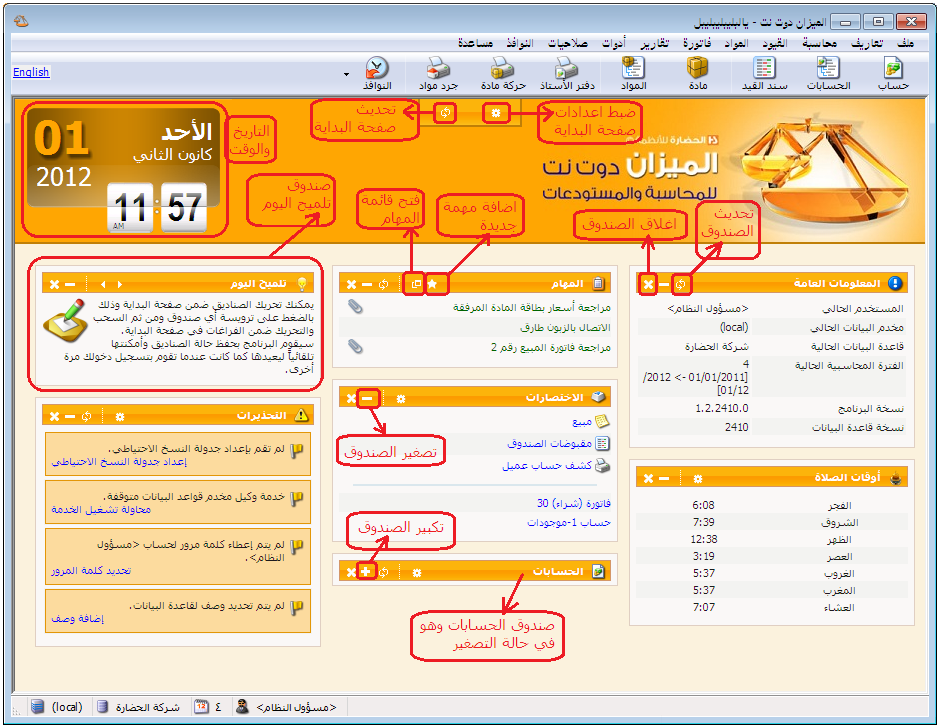
.
Use Animation Effects: Enable this option to animate expanding and collapsing panels. If disabled, panels expand and collapse immediately.
Number of Columns: Enter the number of columns used to arrange the Start Page panels.
Automatic Refresh Every (Minutes): Enter the interval in minutes at which Start Page information is refreshed.
Panels: #
Choose which panels to display: Reminders, Accounts, Tip of the Day, Tasks, Shortcuts, Prayer Times, General Information and Warnings. Each panel and its settings are explained below.
Properties Button: Select a panel and click Properties to the left of the panel list to configure it.
Font: Use the following fields to set the Start Page font, size and style.
- Font Name: Select the font. The button to the left lets you choose whether the list contains standard fonts or all fonts, as shown below.
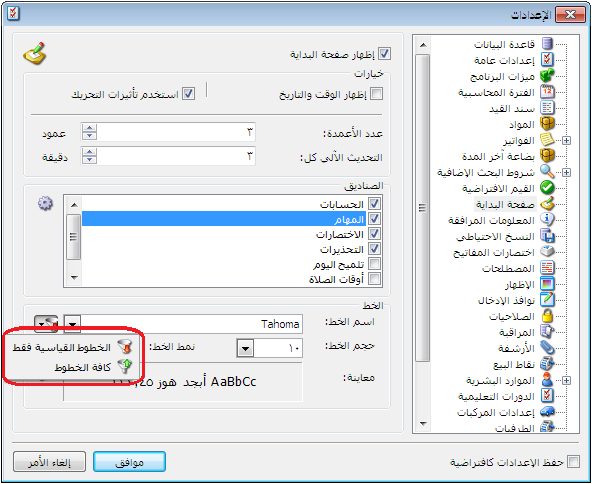
.
- Font Size: Set the font size.
- Font Style: Choose regular or bold.
- The blue arrow to the left of the preview restores the default font settings.
Available Start Page Panels and Their Settings: #
First, the panel toolbar buttons perform the following functions:


The following panels can be enabled: #
- Reminders Panel: This panel is currently specific to the Human Resources program and is not covered here.
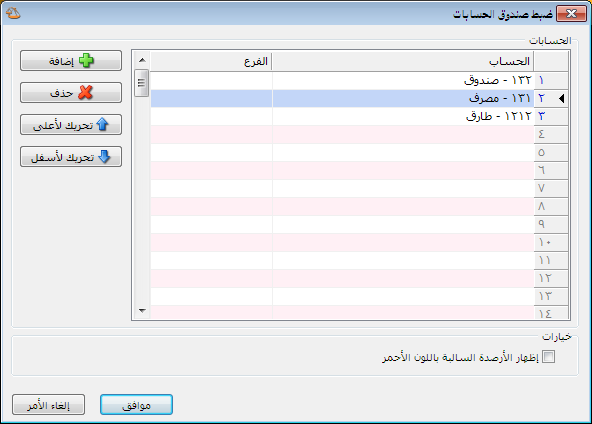
- Accounts Panel: Add important accounts to monitor their balances. The panel displays each account name and balance, refreshing automatically as new movements occur. Click Configure Accounts Panel to add accounts and control their display using the following window.
.
Add: Use this button to add a new row for an account.
Delete: Select an account and click Delete to remove it from the panel.
Move Up / Move Down: Select an account and move it up or down to change the display order.
Options: #
Show Negative Balances in Red: Enable this option to show negative, or credit, account balances in red.
Add the accounts to display. You can specify a branch for an account to show only its balance in that branch.
Note:
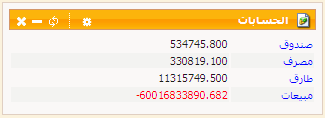
Click an account name on the Start Page to open its General Ledger directly.
The following illustration shows how accounts appear in this panel.
.
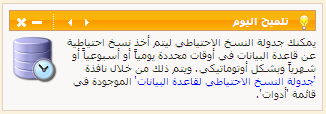
- Tip of the Day Panel: This panel automatically displays useful program instructions and tips. Use Next Tip to browse further tips, as explained above.
The following illustration shows how tips appear in this panel.
.
Tasks Panel: #
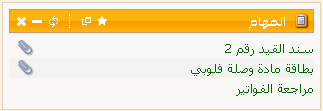
Use Tasks to create work items for yourself or other program users and follow their completion. Tasks can be linked to database records, such as an invoice or journal voucher. The panel is linked to Tools and Task List, described in its dedicated guide. Only tasks with New, In Progress or Return status appear on the Start Page; Completed and Closed tasks are excluded. The panel appears as follows.
.
Note 1:
The button to the left of a task description indicates a linked program record, such as an item card, account card or invoice, as illustrated below.
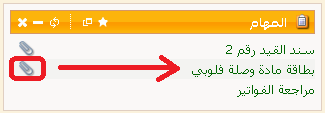
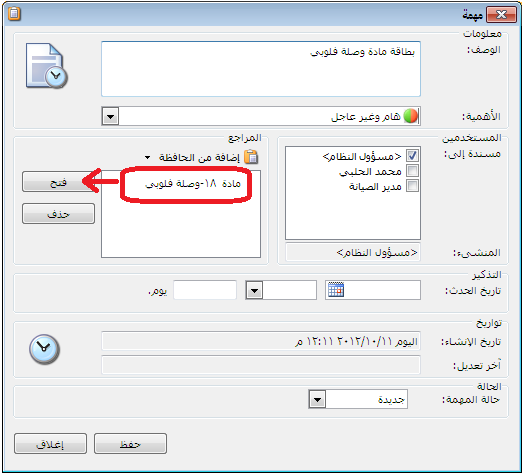
.
Note 2:
Add tasks from Task List, from Add in the Tasks panel, or from Operations and Create Task in the record you want to link, as shown below.
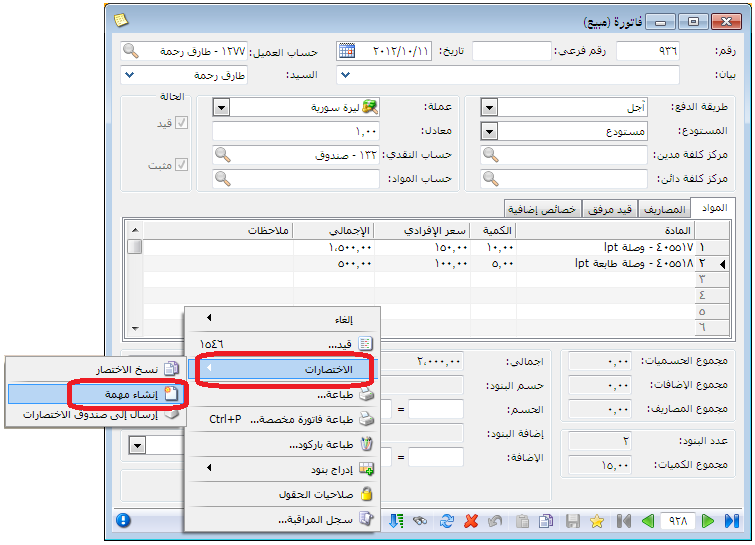
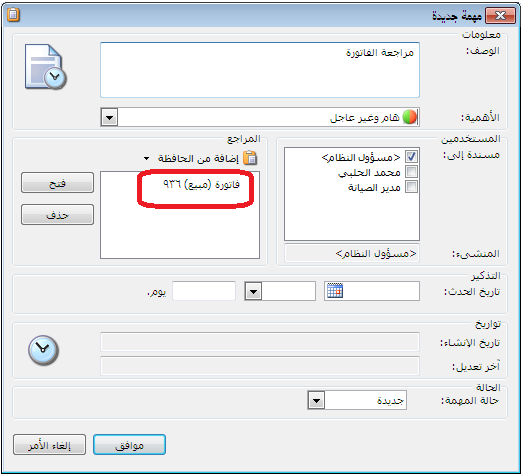
.
Shortcuts Panel: #
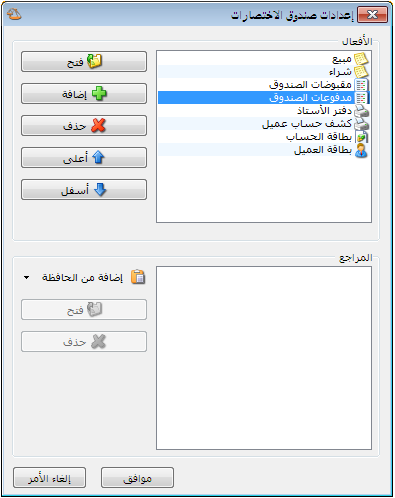
Add frequently used windows, reports or records for direct access without searching program menus. Click Configure Shortcuts Panel to add shortcuts and control their display in the following window.
.
The fields are divided into two sections:
Actions Section: Add shortcuts to program windows or reports, such as Account Card, Customer Card, Cash Receipts or Sales Invoice.
References Section: Add shortcuts to specific records, such as Sales Invoice 1, Cash Receipt 5 or an item card named Printer Cable.
Action Shortcut Buttons: #
The buttons appear in the following order:
Open: Select a shortcut and click Open to open its window directly.
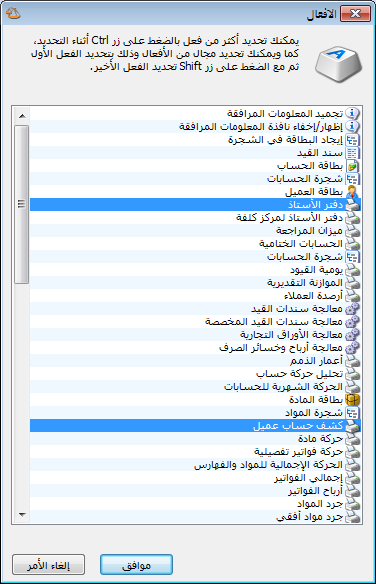
Add: Click Add, select a window or report and click OK. To add multiple entries at once, hold Ctrl while selecting them, then click OK. The selection window is shown below.
.
Delete: Select a shortcut and click Delete to remove it.
Up / Down: Select a shortcut and move it up or down to change its display order.
Reference Shortcut Buttons: The buttons appear in the following order:
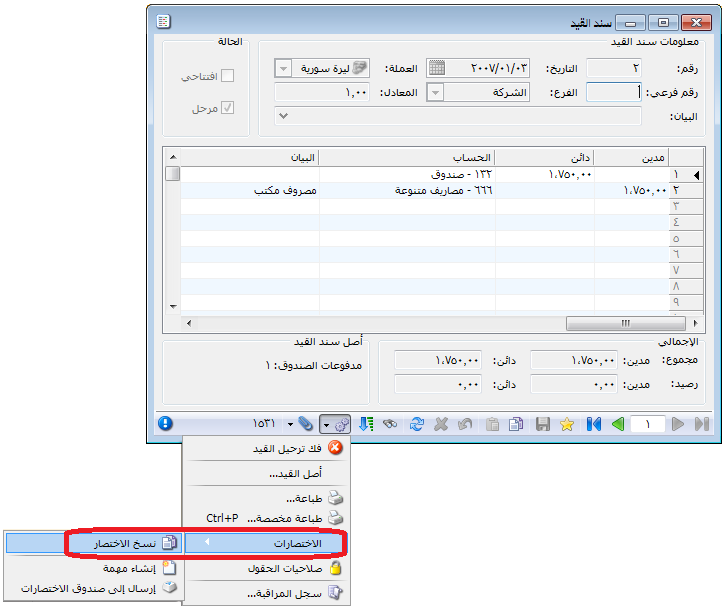
Add from Clipboard: Add a shortcut to a specific record, such as an invoice or journal voucher. First open that record and select Operations, Shortcuts and Copy Shortcut, as illustrated below.
.
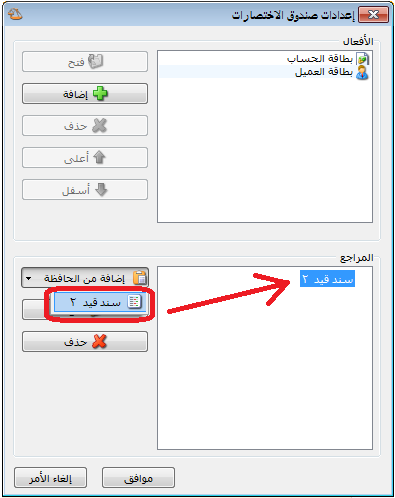
The record shortcut is then available on the clipboard and can be added as shown below.
.
Note 1:
To add a record directly without copying it to the clipboard, choose Operations, Shortcuts and Send to Shortcuts Panel, as illustrated below.
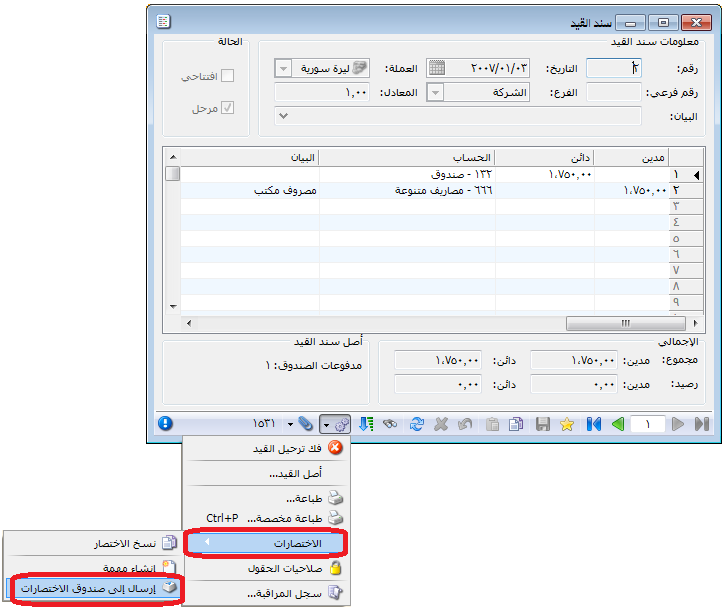
.
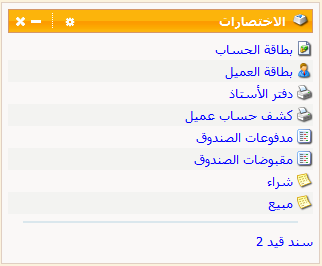
The following illustration shows the panel.
Prayer Times Panel: #
View prayer times and configure location and calculation methods. Click Configure Prayer Times Panel to set Calculation Method, Asr Calculation Method, Country, City and Time Zone. You can also define a custom city using latitude and longitude. The fields are shown below.
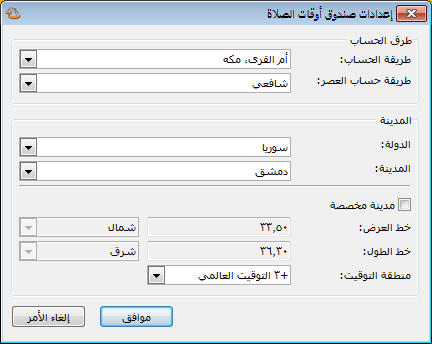
.
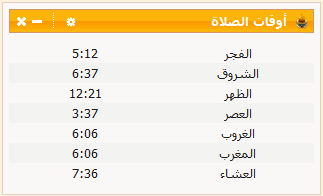
The following illustration shows the panel.
.
General Information Panel: #
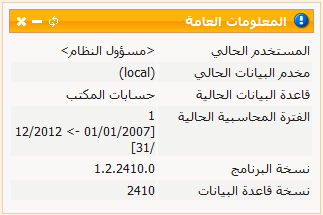
This panel displays the following database information in order:
Current User.
Current Database Server.
Current Database.
.
Current Accounting Period.
Program Version.
Database Version.
The following illustration shows this panel.
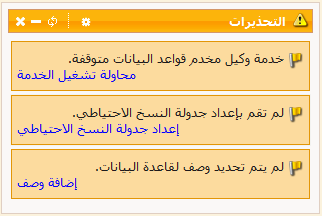
Warnings Panel: #
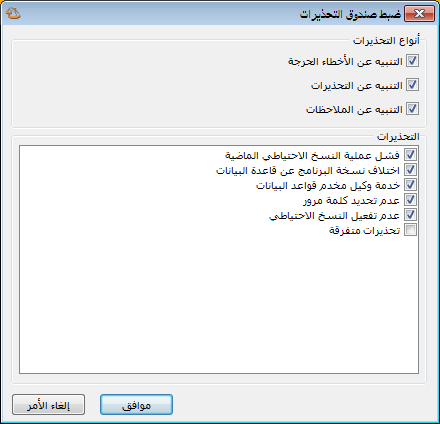
This panel displays issues that may affect program operation or the database if left unresolved. Click Configure Warnings Panel and enable the warning types relevant to your work. The window contains the following settings:
.
Warning Types: Three levels are available:
- Notify About Critical Errors.
- Notify About Warnings.
- Notify About Notices.
The following additional warnings can be enabled:
- Previous Backup Failed.
- Database Server Agent Service.
- No Password Set.
- Backups Not Enabled.
- Miscellaneous Warnings.
- Program and Database Versions Differ.
.


