


Attach different file types to program records
File attachments are supported for most record types, including item records, account records, customer records, invoices, journal vouchers, custom journal vouchers and commercial papers. Supported attachments include images, video, Excel and Word documents, and compressed or uncompressed files. You can store an attachment in the database or link to its original file to reduce database size. Attachment size limits can be adjusted as needed. A dedicated attachment report provides flexible filters for locating files associated with program records.
How to attach a file to a program record: #
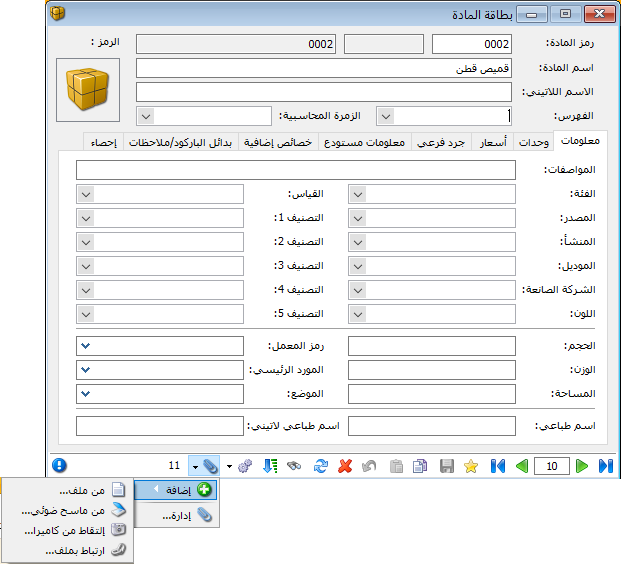
Open the required record, then click the Attachments button as shown below.
.
Read also: Define an Item Record
The available commands are:
Add: There are four ways to add an attachment:
From File:This option stores a copy of the selected file in the database and attaches it to the current record. Deleting the original file from its previous location does not remove the database copy. This keeps attachments within the database, but large files increase database size. #
From Scanner: This option scans an image and attaches it directly to the current record. As with the previous method, the attachment becomes part of the database. #
Capture from Camera: Connect a camera to the computer to capture an image and attach it to the current record. The captured image becomes part of the database, as with the previous methods. #
Link to File: This option stores only the file link in the database, rather than the entire file. If the original file is deleted or moved from its recorded location, the attachment will no longer be accessible. Keep linked files in a dedicated folder and preserve that folder and its contents. Linking avoids storing large file contents in the database. #
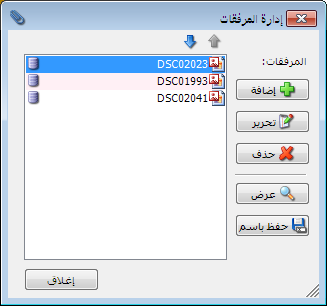
Manage: This window lets you add, delete, rename, view and save attachments to another disk location. The available commands are shown below: #
.
Add: Use this button to add a new attachment to the current record.
Edit: Use this button to rename the attachment or change the attached file by selecting a different path, as shown in the previous window.
Delete: Use this button to delete the attachment.
Show: Use this button to view the attachment.
Save As: Use this button to save a copy of the attachment to a computer disk.
- How to configure archiving settings and limits:
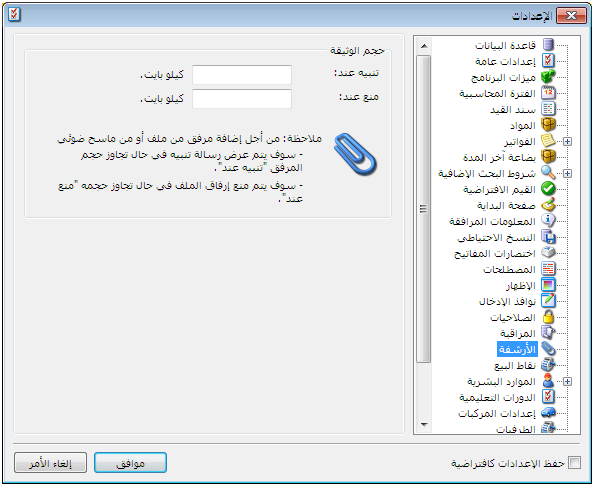
Open the Archiving tab in General Settings to configure attachment size limits. You can set a warning threshold and a separate maximum size above which the program prevents the file from being attached. The following image illustrates these settings:
.
Important Note:
The warning threshold must be lower than the blocking threshold. For example, the program can warn when a file reaches 100 KB and block attachments of 500 KB or more. Reversing these thresholds would not provide a useful warning before blocking.
View archived files using the Document Processing report: #
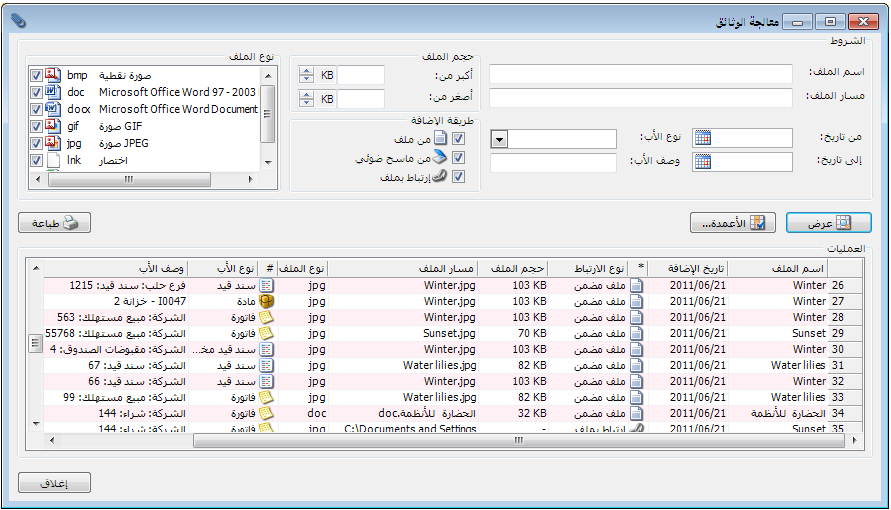
The Document Processing window displays archived attachments and provides filters to narrow the results. The following fields are available:
.
File Name: Enter a name to display attachments with that name.
File Path: Enter a path to display the attachment stored at that path.
File Size: Greater Than: enter a size to display larger attachments. Less Than: enter a size to display smaller attachments.
From Date / To Date: Specify a date range to display attachments added during that period.
Parent Record Type: Select the type of record associated with the attachment, such as an invoice or item record. Selecting Item Record, for example, displays files attached to item records.
Parent Record Description: Enter a description for the required item or account record to display only its attachments. For example, entering an item name displays attachments associated with that item.
Attachment Method: Select an attachment method, such as From File, to display attachments added by that method and exclude files added using other methods.
File Type: Select a file type to display attachments of that type. This list shows the types of files that have actually been attached, rather than a predefined list of file types.
Show: #
Use this button to display attachments that match the selected filters.
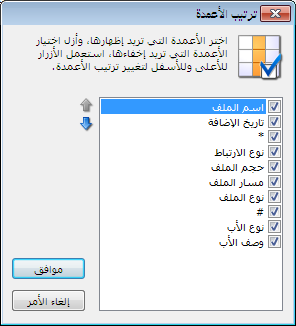
Columns: #
Use this button to choose report columns. Enable the required columns in the Columns window, then use the blue arrows to change their order, as shown below:
.
Print: #
Use this button to print the information displayed in the report.
Note:
You can also select an attachment row and right-click to perform the following operations:
Show: View the attachment.
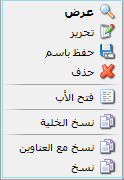
Edit: Edit the attachment name and path.
Save As: Save the attachment to a computer disk.
Delete: Delete the attachment.
Open Parent Record: Open the record to which the file is attached.
The copy commands provide three options:
Cell: Copy a selected cell from an attachment row in the report.
With Headers: Copy one or more attachment information rows together with the table headers.
Copy: Copy one or more attachment information rows.
.


