


Print Designer is a core Al Mizan .NET feature with extensive layout and formatting controls.
Open Tools and Print Designer, as shown below.
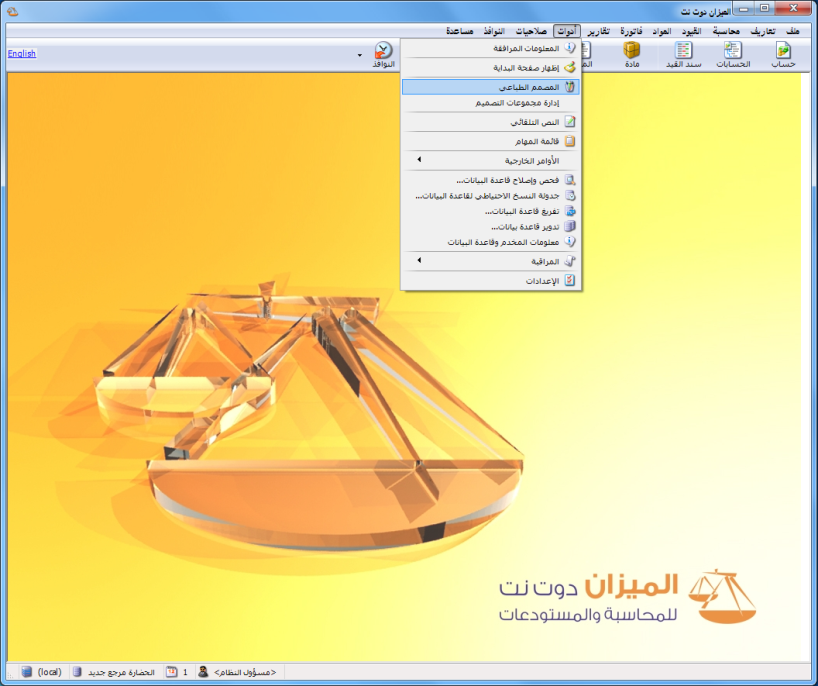
.
Print Designer #
The designer supports general layouts, commercial papers, invoice barcodes, invoices, transfer invoices, item and account cards, standard and custom journal vouchers, maintenance jobs, POS receipts, manufacturing operations and templates, training courses, parking receipts, manufacturing plans, fixed assets, property units, property cards, real estate contracts and Human Resources layouts.
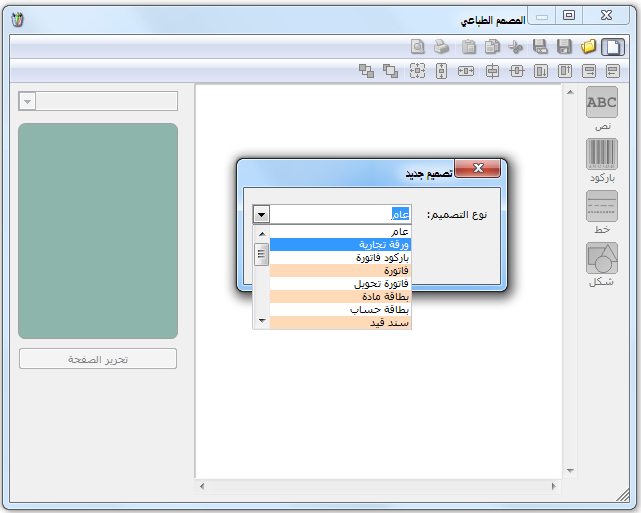
Click New and select the required design type, as shown below.
.
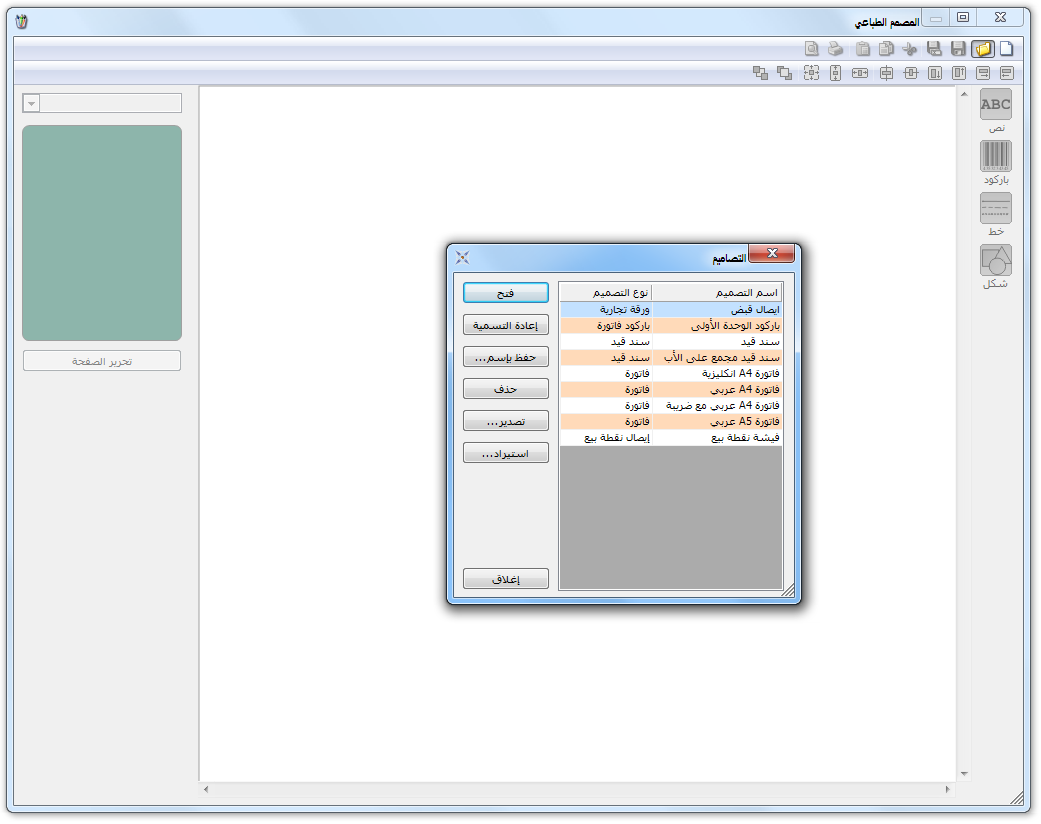
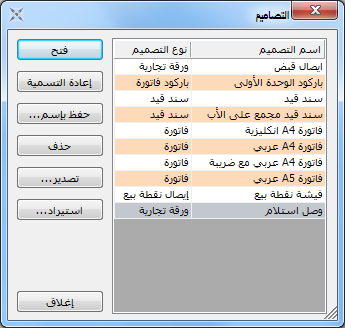
When creating a database of type SimpleAccTree)) the program creates several default layouts. Use them as provided or edit them. Click the folder icon to display stored layouts, select one and click Open, as illustrated below.
.
The same window offers these operations:
Window Options: #
Rename: Change a layout name, for example from Cash Receipt to Receipt Voucher.
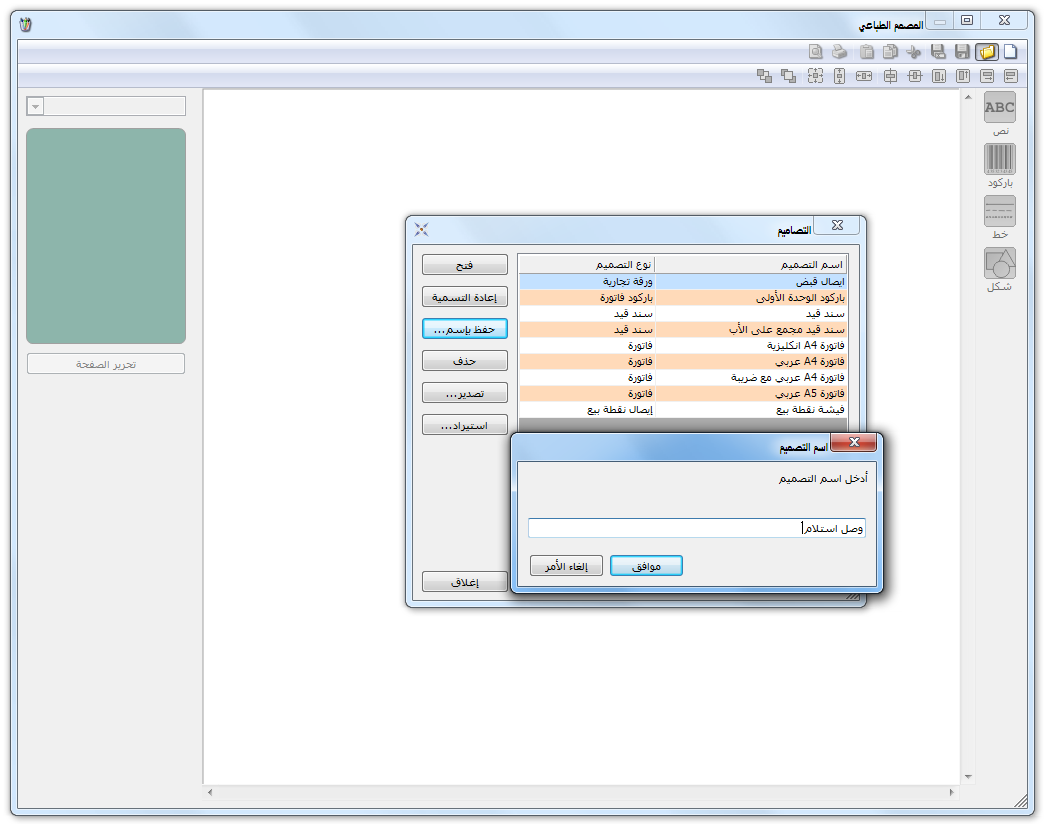
Save As: Use Save As to create a copy under a new name. Select the layout, click Save As, enter the new name and click OK. The copy appears among layouts stored in the database, as illustrated below.
.
Note:
Copy an existing layout when you need a similar design, then edit the copy rather than building a new one from scratch.
- Delete: Delete a layout stored in the database.
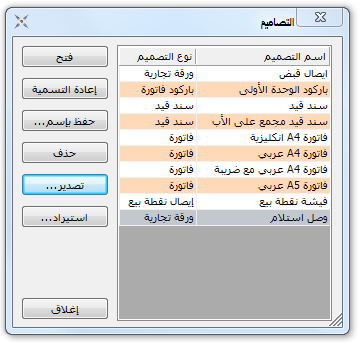
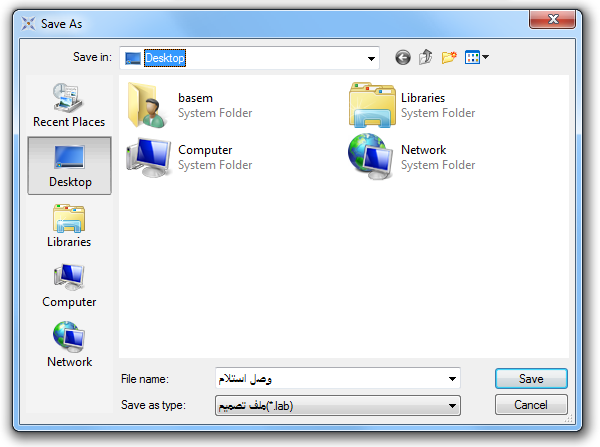
- Export: Select a layout and click Export to save it as a file on your computer. Choose the file name and destination folder in the following window.
.
- Import: Use this button to import layout files from the computer.
Note: #
Export and import primarily let you transfer layouts between databases without recreating them.
The following invoice example explains the designer’s buttons and menus, noting differences for other layout types such as commercial papers and barcodes.:
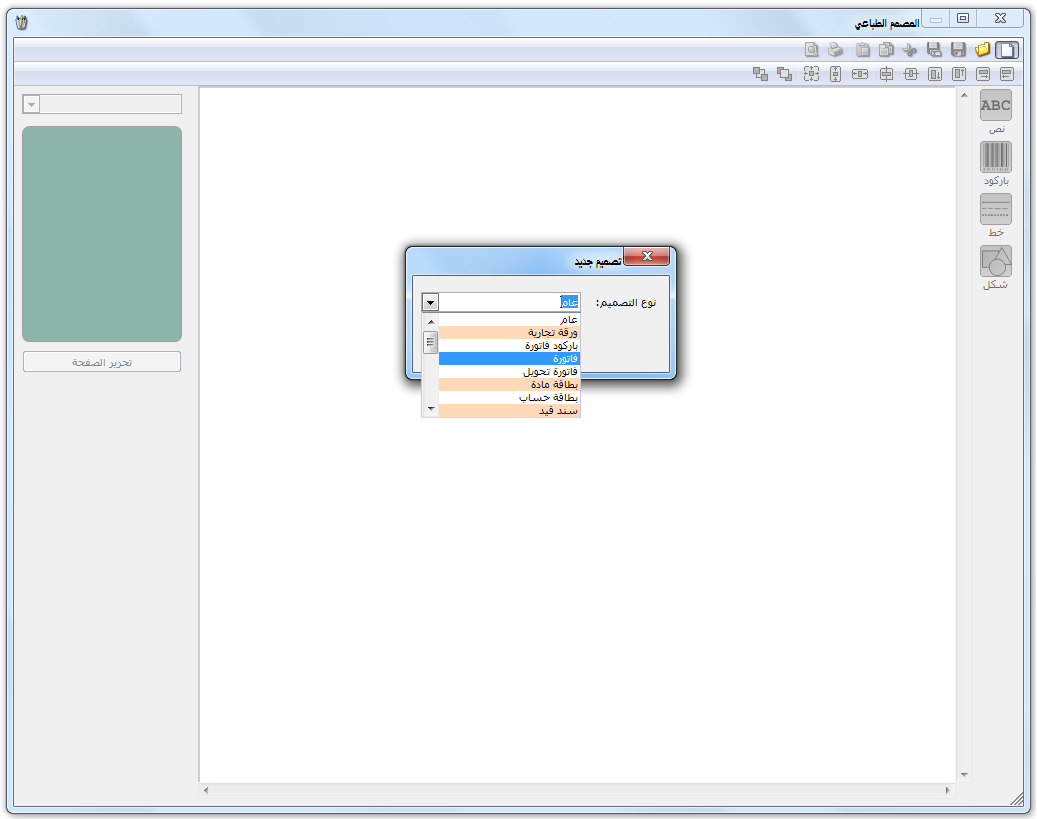
Open Print Designer, click New, select Invoice and click OK, as shown below.
.
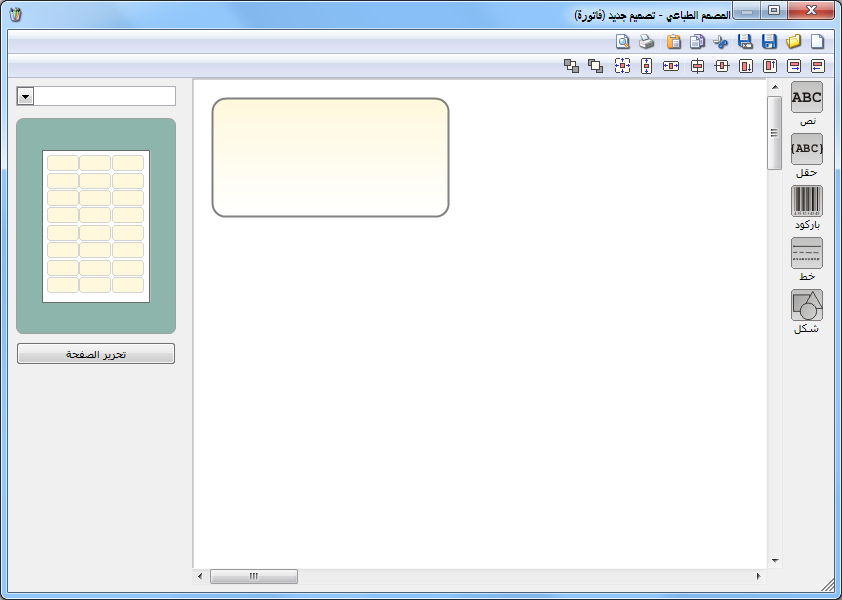
Click Edit Page in the following window.
.
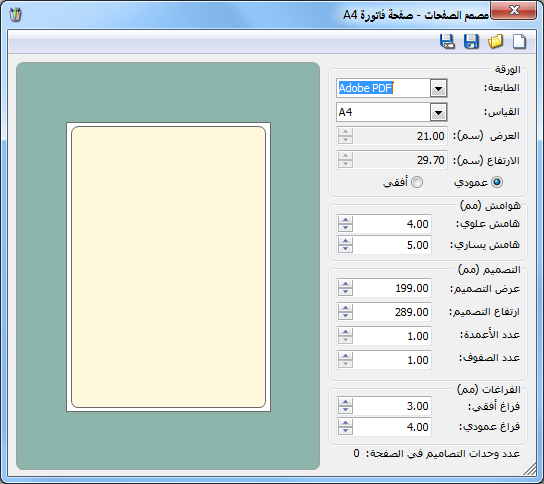
Page Designer opens so you can configure the paper used to print the invoice. It contains the following fields::
Paper #
Printer: Select the printer for this page. Different page layouts can use different printers.
.
Size: Select the paper size.
Width / Height: Enter the paper dimensions when Custom is selected in Size.
Portrait / Landscape: Choose the page orientation.
Margins #
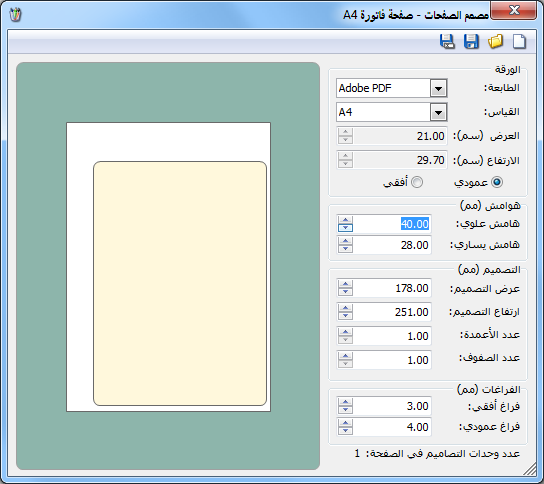
Top Margin / Left Margin: Set the space between the printable area and paper edges, as illustrated below.
.
Design #
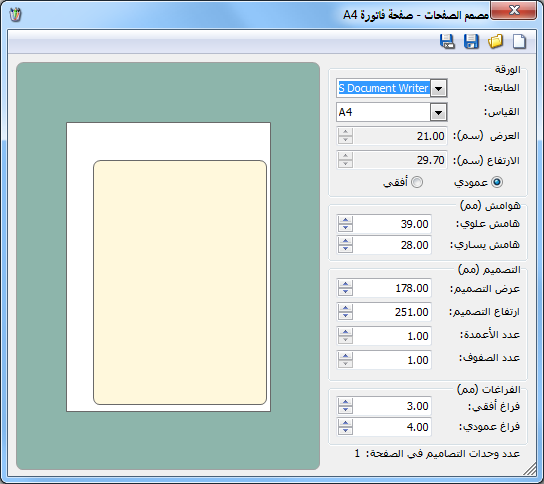
Design Width / Design Height: Set the dimensions of the printable area shown in yellow, as illustrated below.
.
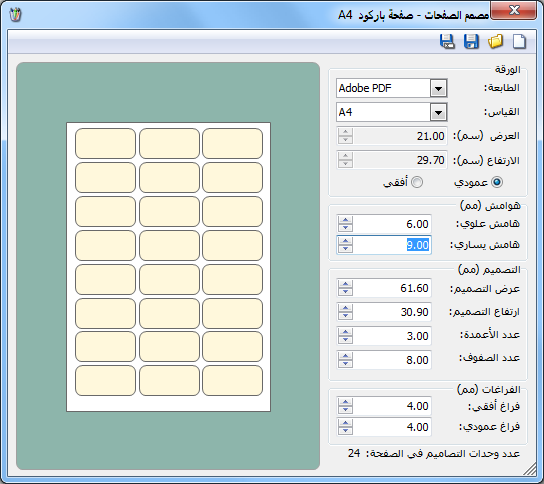
Number of Columns / Number of Rows: Set the number of labels per page, mainly for barcode label sheets. Match the sheet size, label size, gaps and margins, as illustrated below.
.
Spacing #
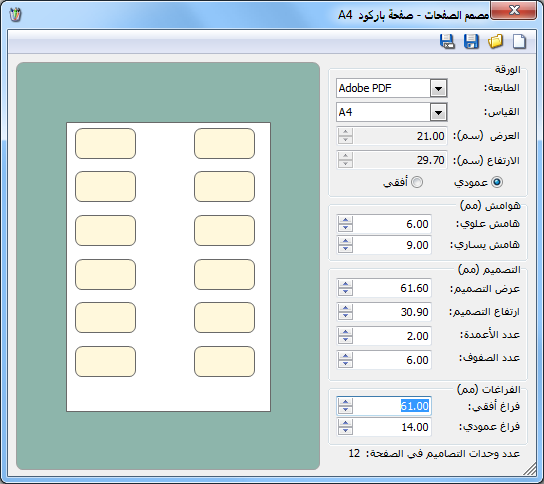
Horizontal Gap / Vertical Gap: Set the gaps between labels when multiple designs are printed on one page, as shown below.
.
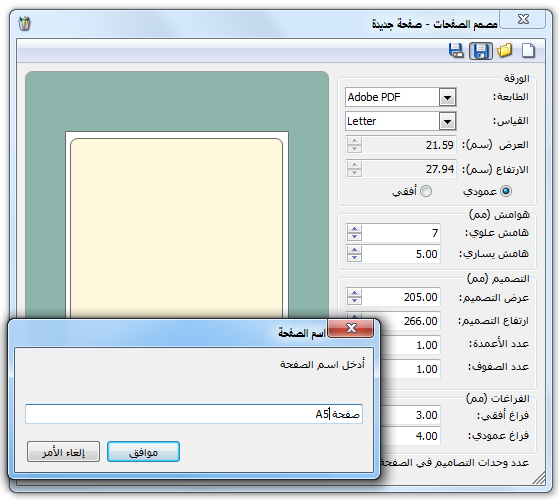
After entering suitable settings, such as for an A5 invoice, click Save and give the page layout an appropriate name, as illustrated below.:
.
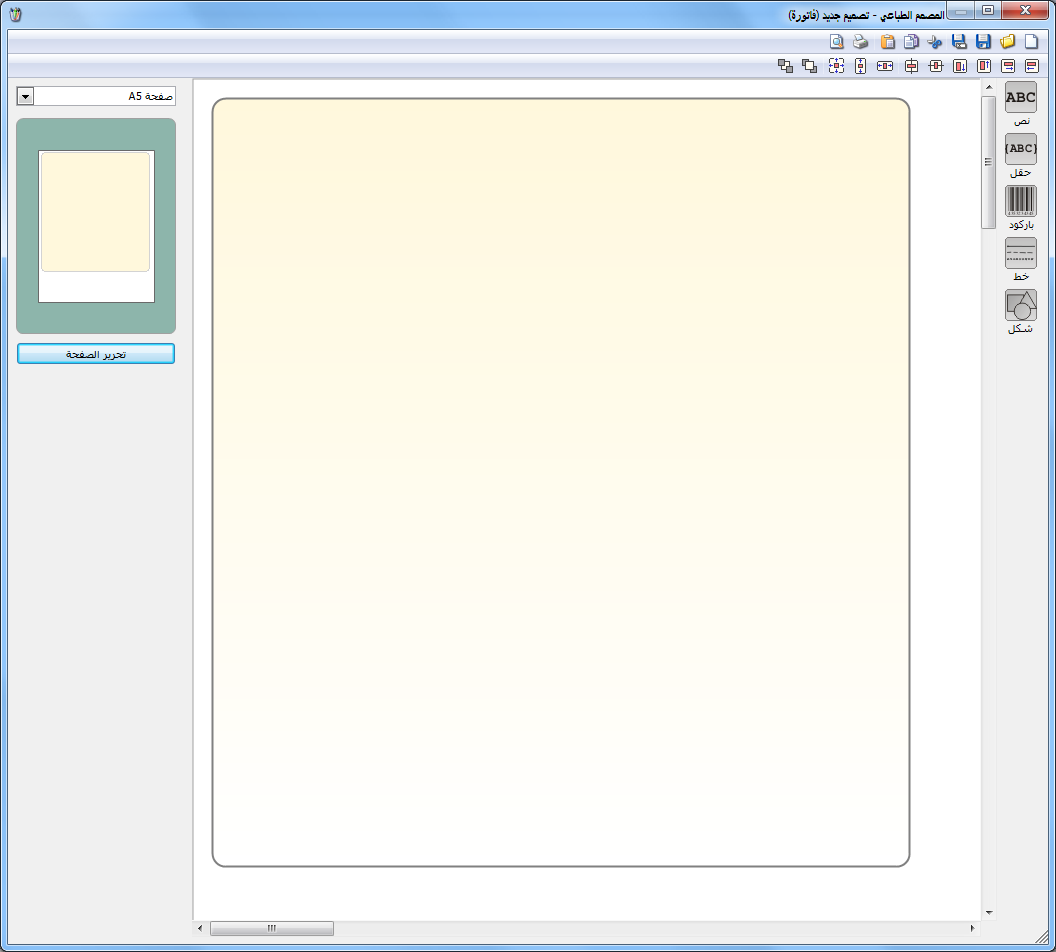
Return to the main Print Designer window and link the page layout you created, as shown below.
.
Design the invoice using the toolbars, divided into the following sections.
1. Right Toolbar #
This toolbar contains the following buttons:
 Text: #
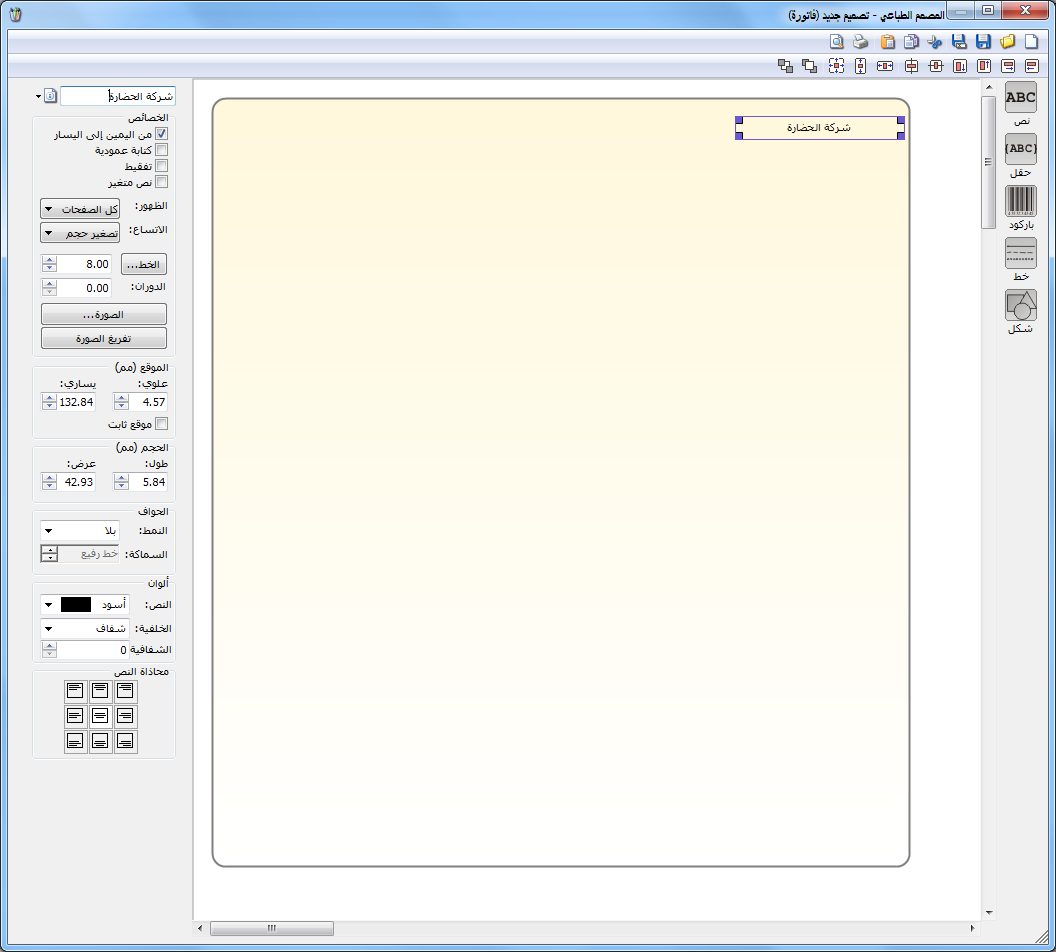
Use Text to insert fixed text, such as an invoice heading. Click Text and enter the desired content, such as Hadara Company, in the text box using the indicated field.
 Field: #
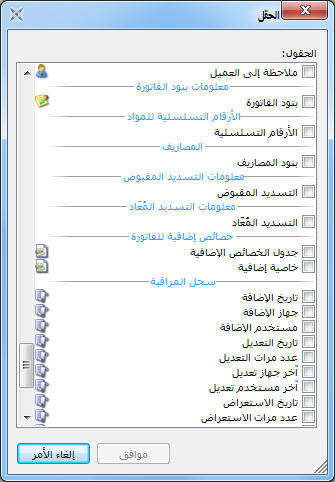
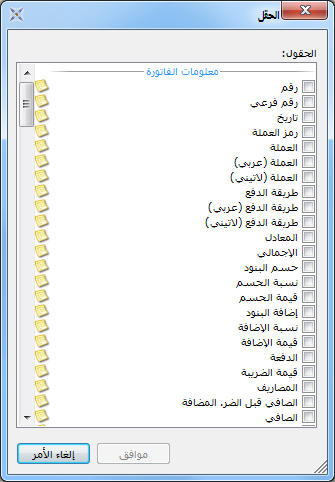
Insert data that changes between printed invoices, such as Customer Name, Invoice Type or Invoice Item Lines.
Click Field to display the available fields, organized into these groups:
Invoice Information, Base Currency, Customer Account Information, Customer Information, Invoice Line Information, Item Serial Numbers, Expenses, Received Payments, Returned Payments, Attached Entry, Commercial Papers, Additional Invoice Properties, Audit Log and Account Transaction Linking Information, as illustrated below.
.
Note:
Available field groups depend on the design type selected when clicking New. For example, Invoice Barcode offers fields for barcode labels that differ from those needed for invoices or journal vouchers.
Formatted Text: #
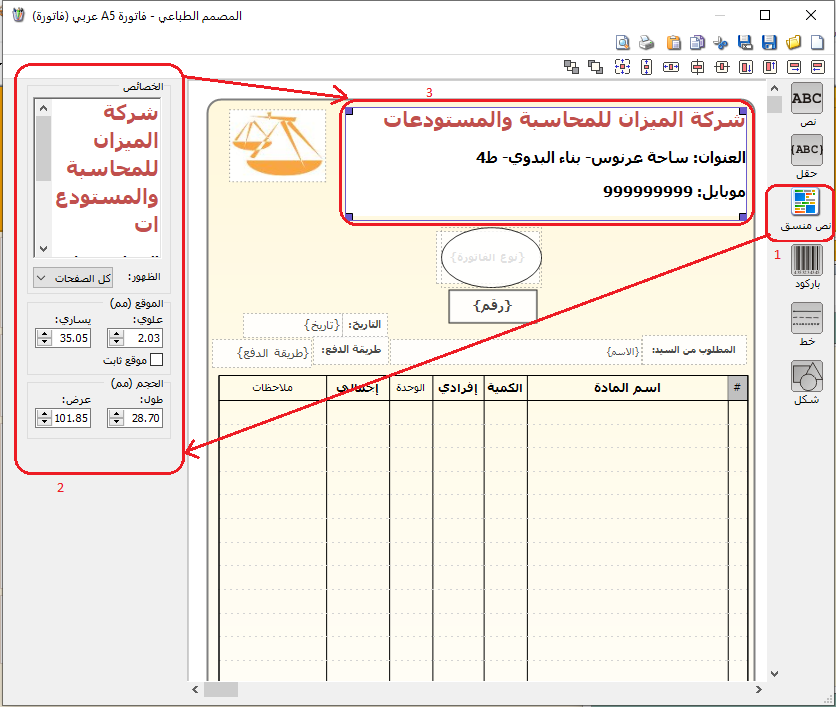
Paste content with its formatting from a Word document.
Note: To change this content, edit it in Word and paste it again into Formatted Text.
As illustrated below:
 Barcode: #
Insert a barcode with a fixed number. A barcode label example follows later.
 Line: #
Insert a line and control its formatting.
 Shape: #
Insert a shape, such as a rectangle, triangle, ellipse or star.
2. Left Toolbar #
The controls depend on the selected design element. Each case is explained below.
Text: #
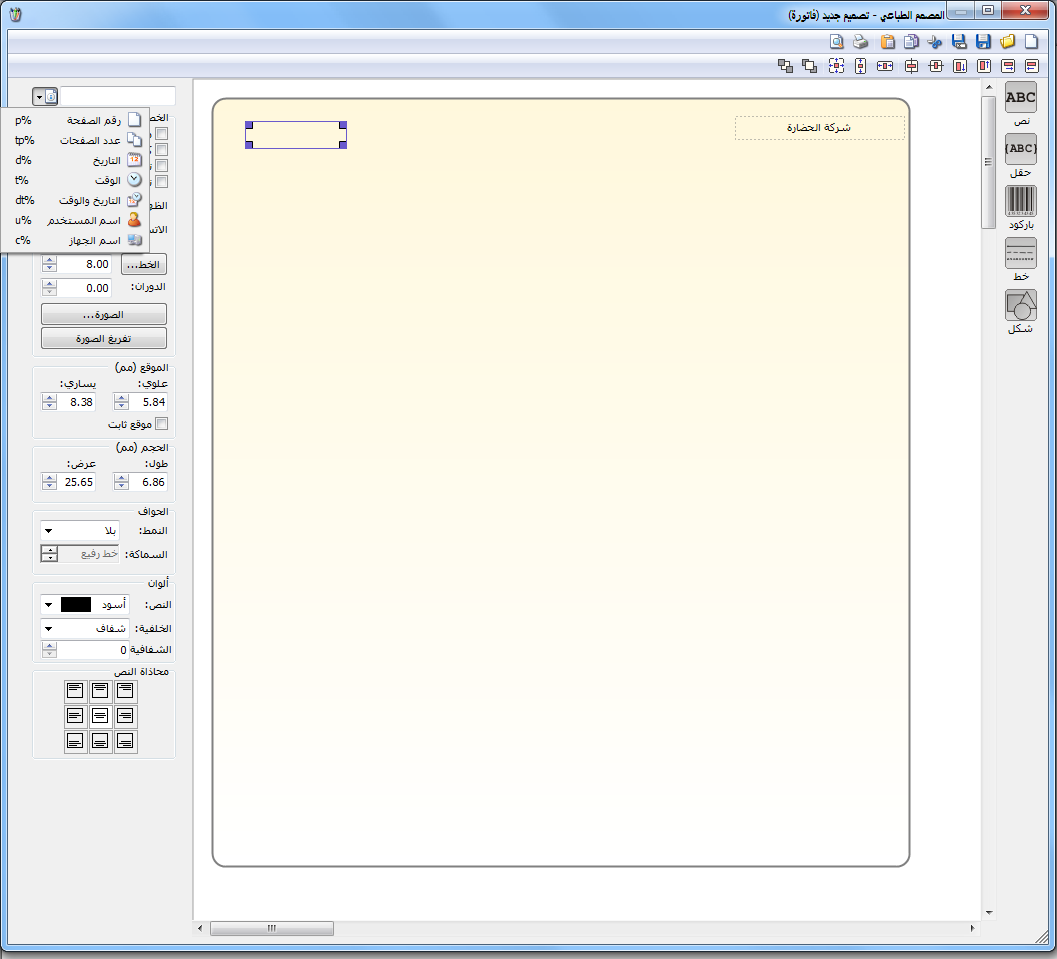
Adding fixed text displays a left toolbar for configuring its text box. It contains the following fields:
.
Text Box: #
Enter the text to display in the layout.
Insert Variables: #
Insert the time, date, page count, user name or computer name.
Properties: #
Properties include:
Right to Left: #
Control whether digits in the text box are displayed using Arabic or English numeral formatting.
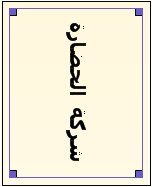
Vertical Text: #
Display the text vertically, as illustrated below.
Number to Words: #
If the text is a number, display it in words. Available languages include Arabic, English, Turkish and Kurdish.
Variable Text: #
Enable a prompt when printing so the user can enter the required text value for that printout.
Visibility: #
Choose which pages show the text: All Pages, First Page, Last Page or Hidden.
Text Fit: #
The following options are available:
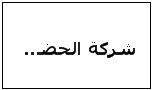
Show Ellipsis: #
Display the text within the box and add dots if there is insufficient space for the rest, as illustrated below.
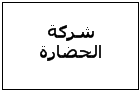
Wrap Text: #
Display text on multiple lines if it does not fit on one line, without cutting off content, as shown below.
Clip End of Text: #
Display only the portion fitting in the available area, without wrapping or an ellipsis, as illustrated below.
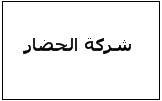
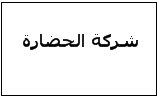
Shrink Font: #
Reduce the font size to display all text on one line within the available area, as shown below.
Font: #
Configure the font type, size and related settings.
Rotation: Rotate the text between horizontal and vertical orientations, as illustrated below.
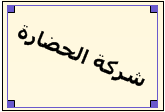
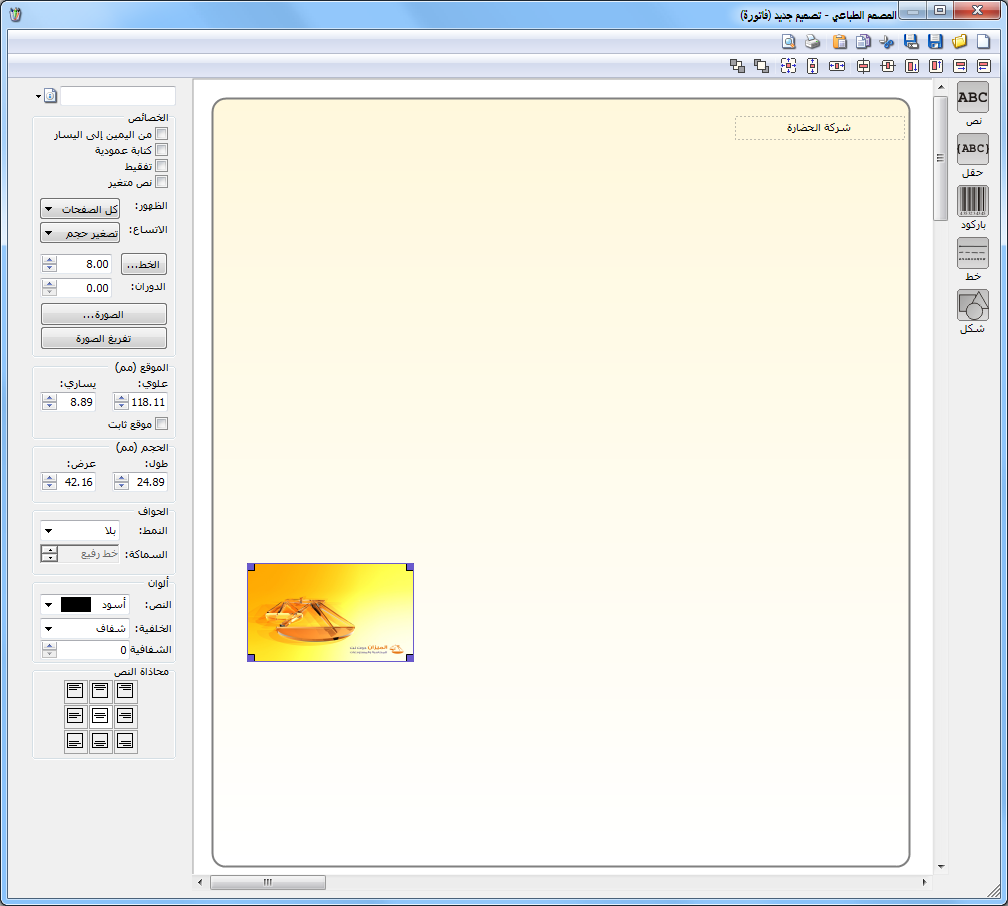
Image: #
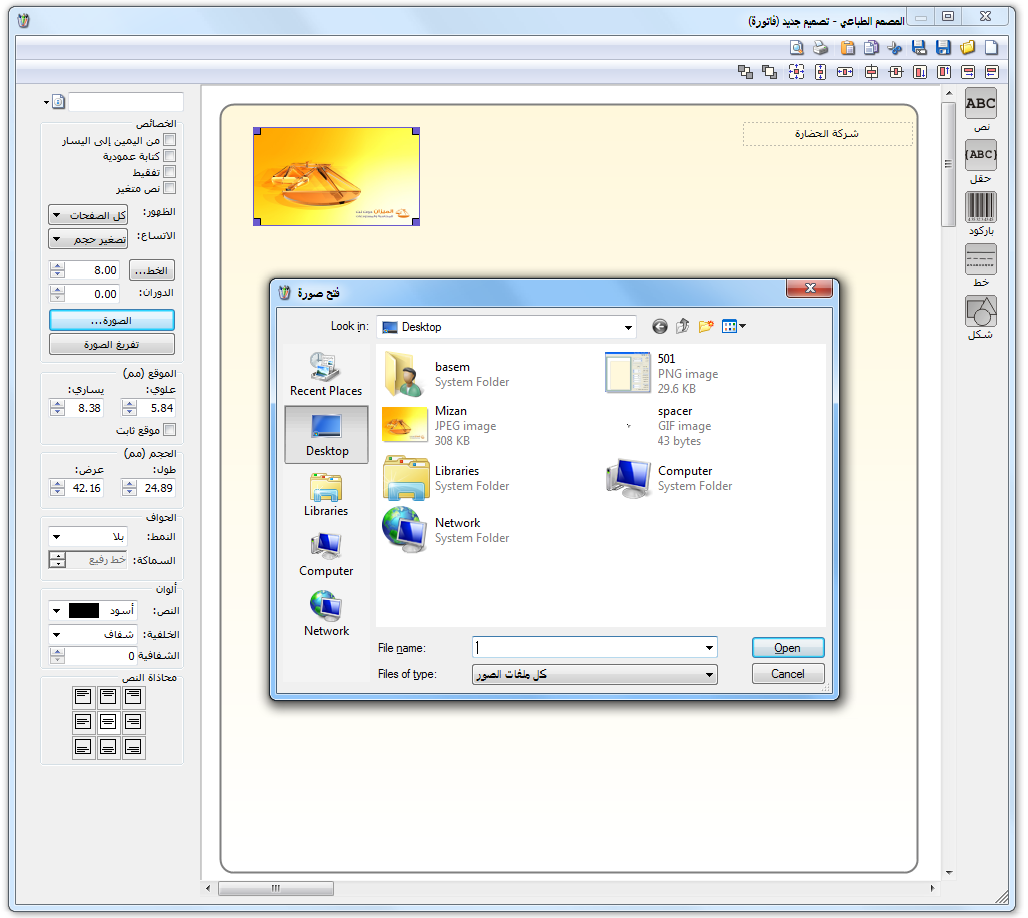
Insert an image or company logo. Select a text box, click Image, choose the image file and click OK, as shown below.
.
Clear Image: #
Select the text box containing the image and click Clear Image to remove it.
Position: #
This section contains:
Top / Left: Set the text box position, as shown below.
.
Fixed Position: #
Keep the specified position unchanged by other layout behavior, such as pulling fields below a table, explained later.
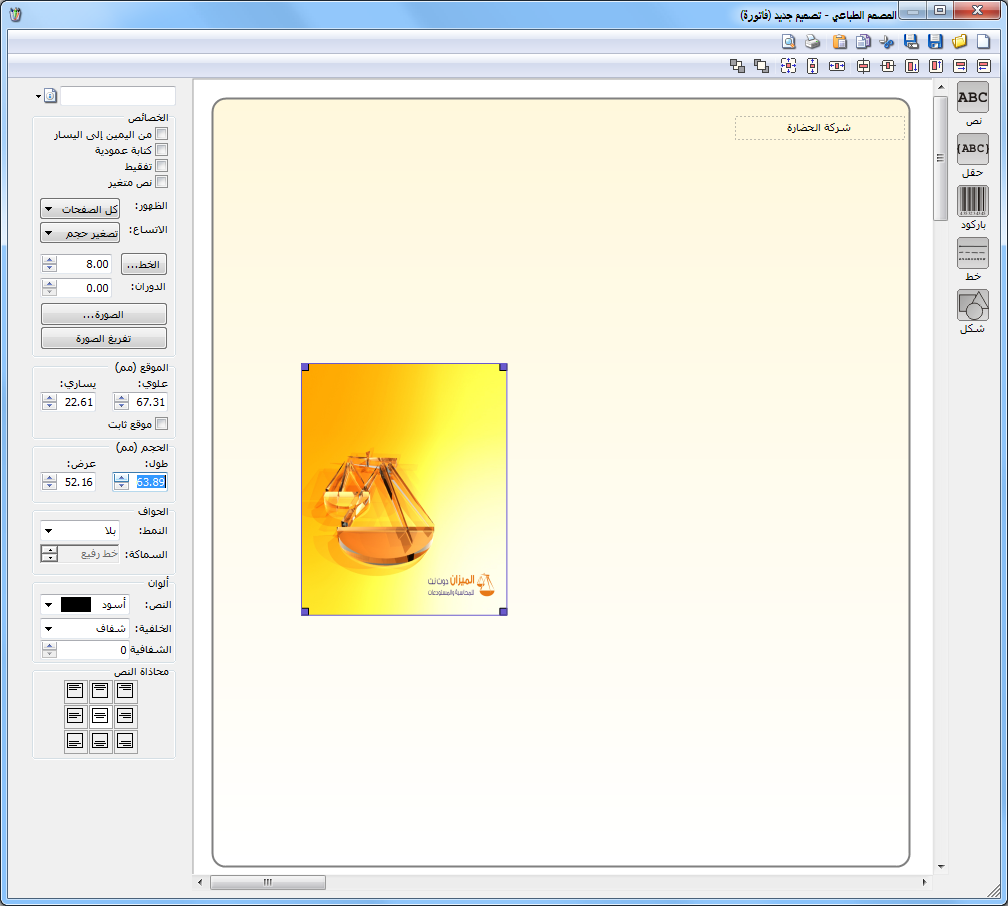
Size: #
This contains two fields:
Height / Width: Set the text box dimensions, as illustrated below.
.
Borders: #
This contains two fields:
Style / Thickness: Set the outer border style and thickness for a text box, data field or table.
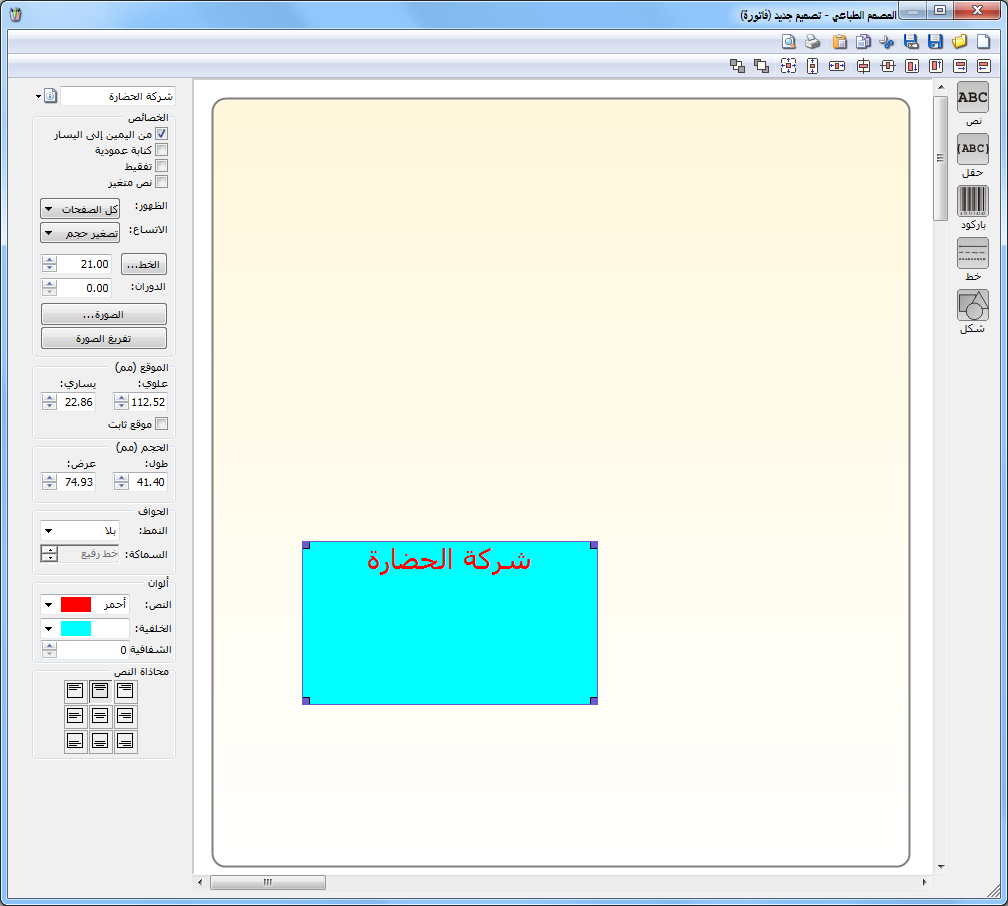
Colors: This contains two fields:
Text / Background / Transparency: Set text and background colors and background transparency, as illustrated below.
.
Text Alignment: #
Set the text position inside its box, as shown below.
.
Field: #
Data fields use settings similar to text boxes, with the following additional controls.
Properties: #
Additional options include:
- Number to Words: Enable this option to display a number in words, such as one hundred and five instead of 105.
- Print Borders: For table fields such as invoice lines, choose whether to print borders.
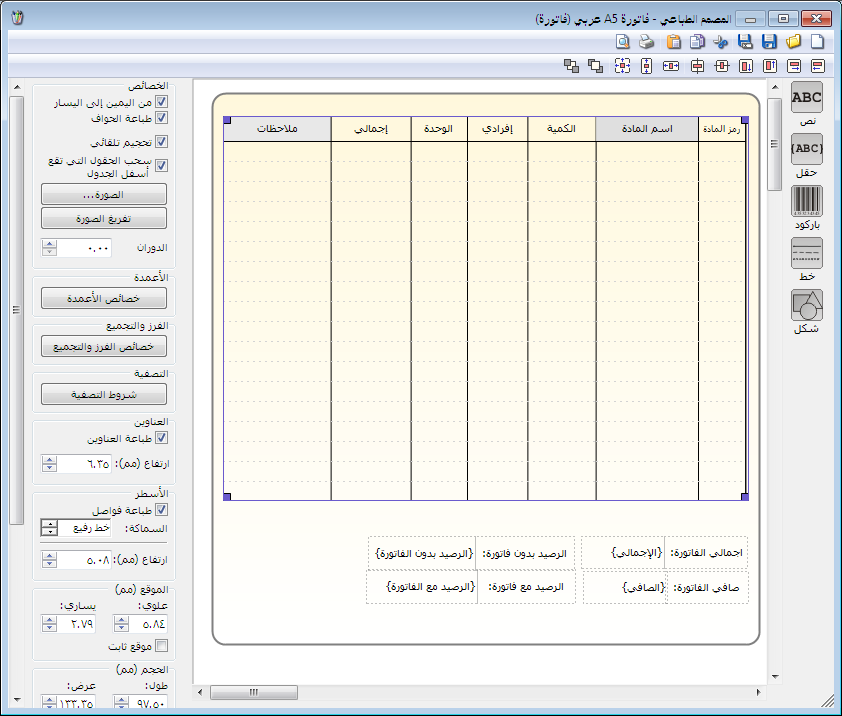
- Automatic Sizing: Shrink the table height so it ends immediately after its last data row.
- Pull Fields Below the Table: Consider the layout shown below.:
.
Enable Pull Fields Below the Table to move fields such as invoice total and net total directly below the last printed table row. For invoices with only one or two lines, this avoids leaving the unused portion of the table as blank space between the rows and the totals.
Convert to Barcode: #
A barcode data field, such as First Unit Barcode, initially appears as a number. Select it and click Convert to Barcode to turn it into a scannable barcode.
Select the required barcode format from the available options:
EAN-13, EAN-8, Code 39, Code 128 or QR Code.
Column Properties: #
Select a table, such as Invoice Item Lines, and click Column Properties to control visible columns, their order, widths and related settings in the following window.
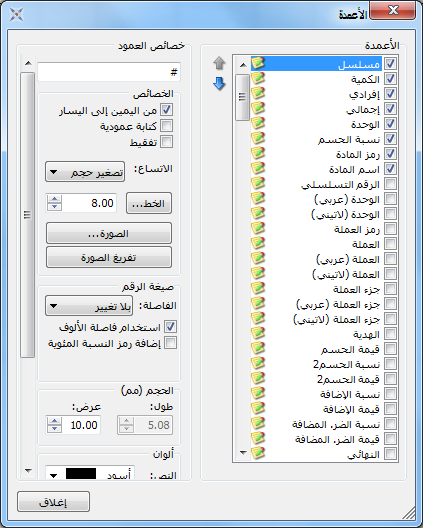
.
Sorting and Grouping Properties #
Sorting and Grouping Properties provide advanced control over records in tables for invoices, journal vouchers and custom vouchers. Sort or group rows using selected fields. These controls are explained in Advanced Print Designer Properties at the end of this guide.
Filter Conditions: #
Filter Criteria control which rows appear in printouts using user-defined conditions. They are explained in Advanced Print Designer Properties at the end of this guide.
See Advanced Print Designer Properties.
Headings: #
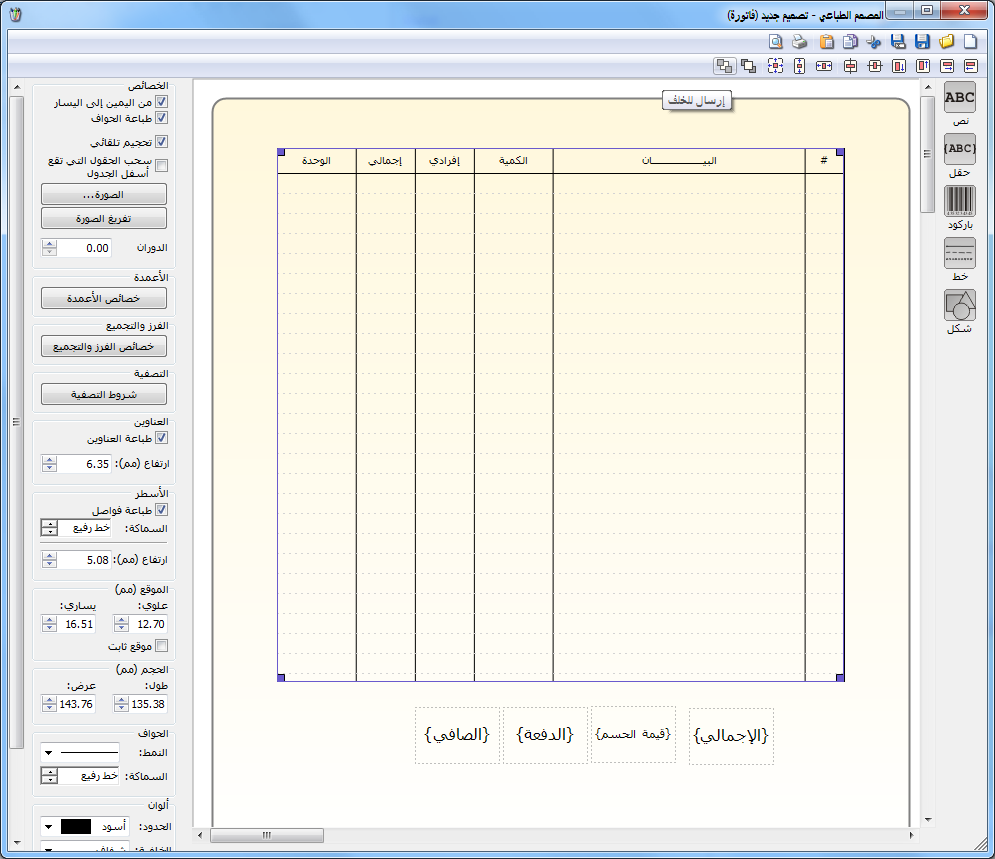
Print Headings / Height: Choose whether column headings are printed and set the heading-row height, as illustrated below.
.
Rows: #
Print Separators / Height: Choose whether to print separators between invoice item rows and set each row’s height.
Repeat on Page: #
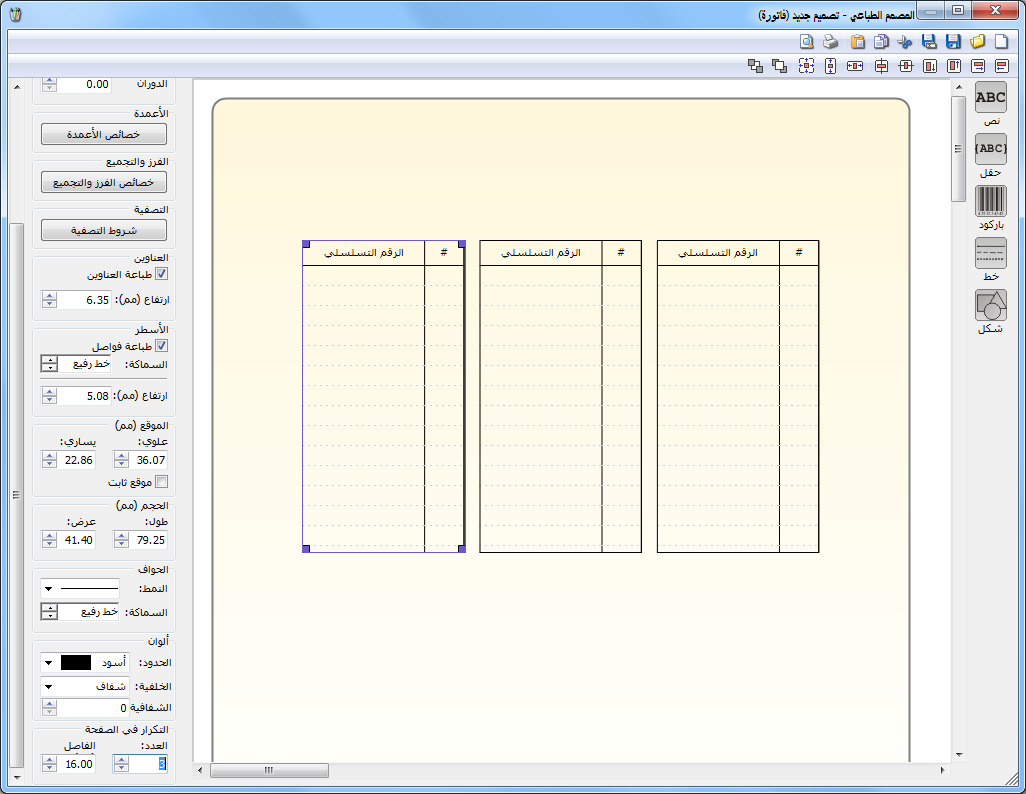
Count / Spacing: Print multiple tables on one page, useful for serial number tables rather than a separate page for each. Set the number of tables in Count and the gap between them in Spacing, as illustrated below.
.
Number Format: #
This appears for numeric fields, such as Total, and includes the following options::
- Decimal Places: Set the number of decimal places.
- Use Thousands Separator: Enable a thousands separator.
- Add Percentage Symbol: Use this option for percentage fields.
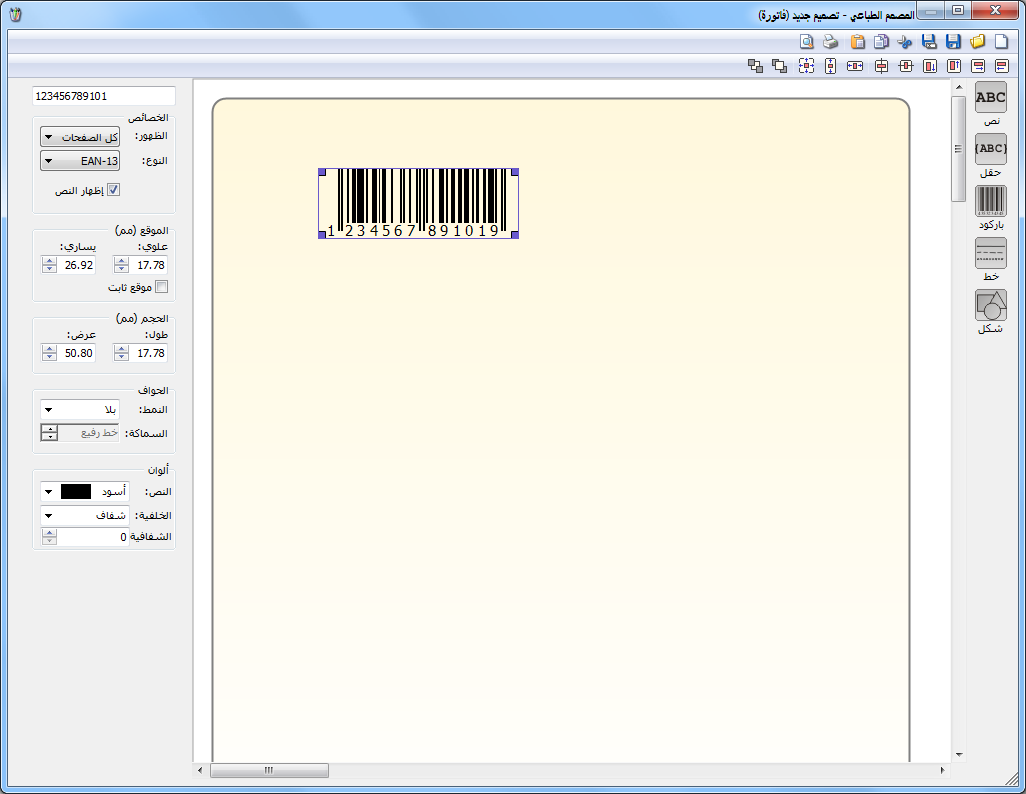
- Barcode: Adding a Barcode displays controls for its size, format, appearance, optional text, position and barcode number, as illustrated below.
.
Line: #
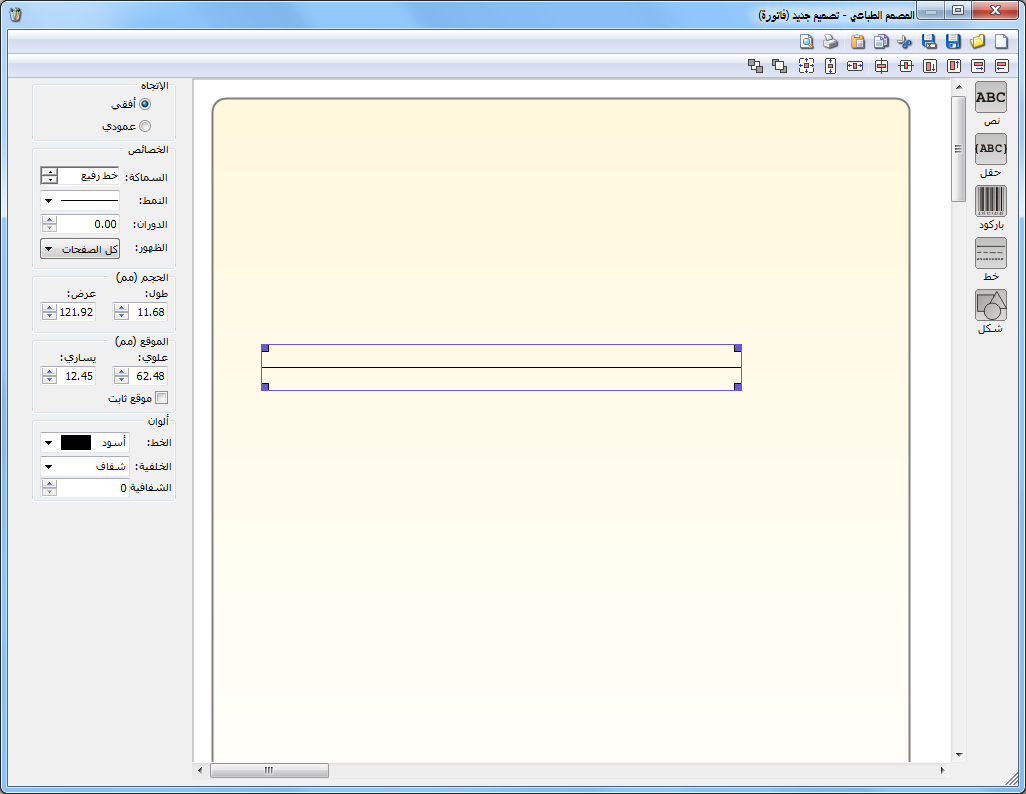
Adding a Line displays controls for horizontal or vertical orientation, thickness, style, rotation, page visibility, box dimensions, position and color, as illustrated below.
.
Shape: #
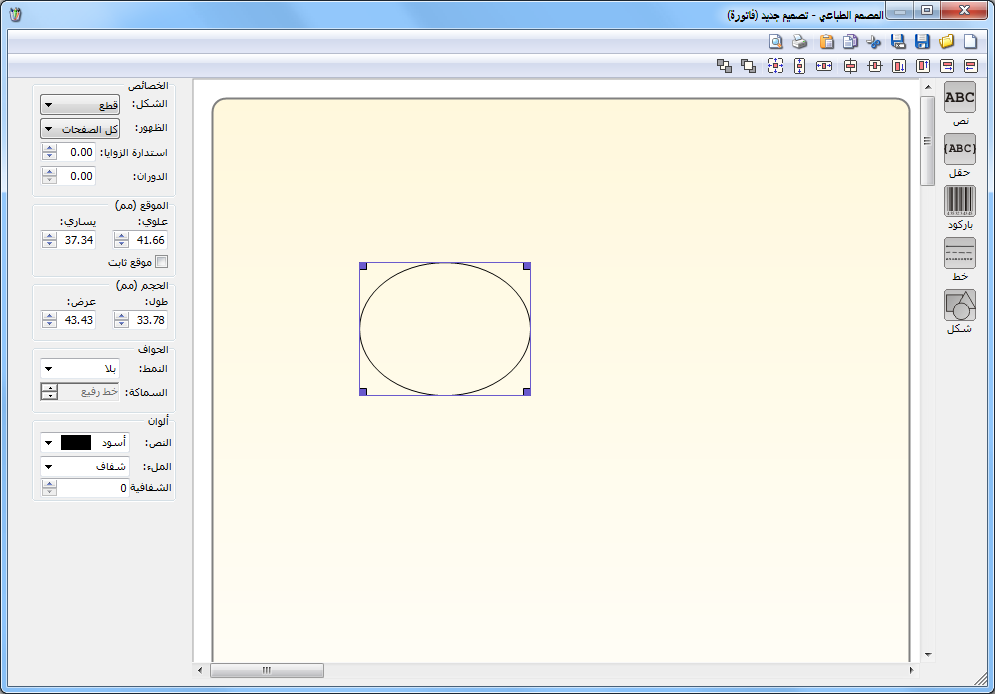
Adding a Shape displays controls for shape type, such as rectangle, triangle, ellipse or star, page visibility, rounded corners, rotation, position, size, border style and thickness, and border and background colors, as shown below.:
.
3. Top Toolbar: #
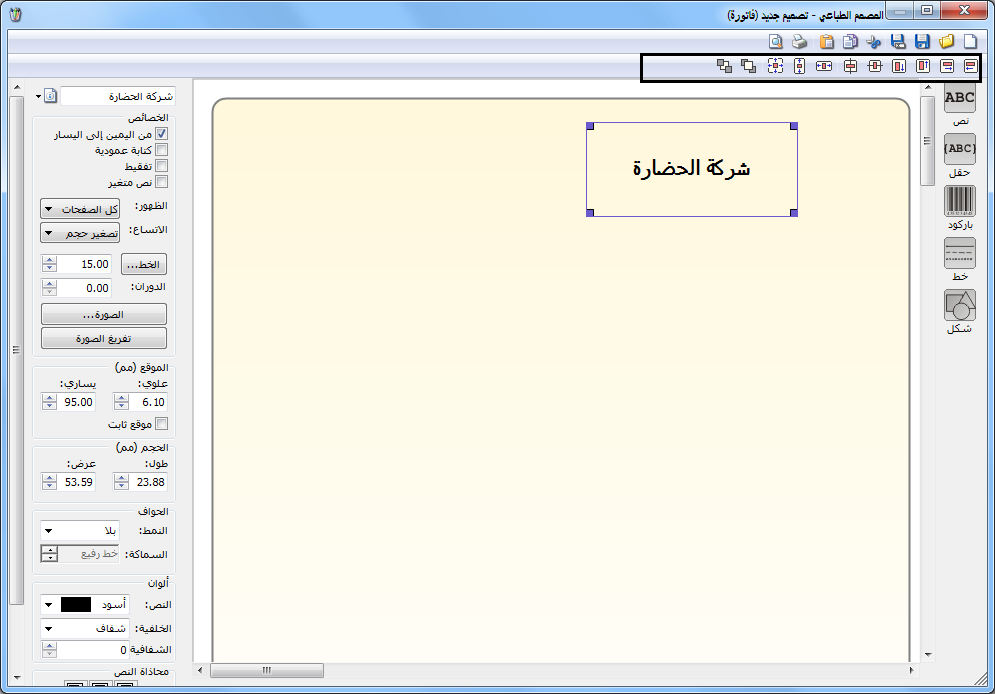
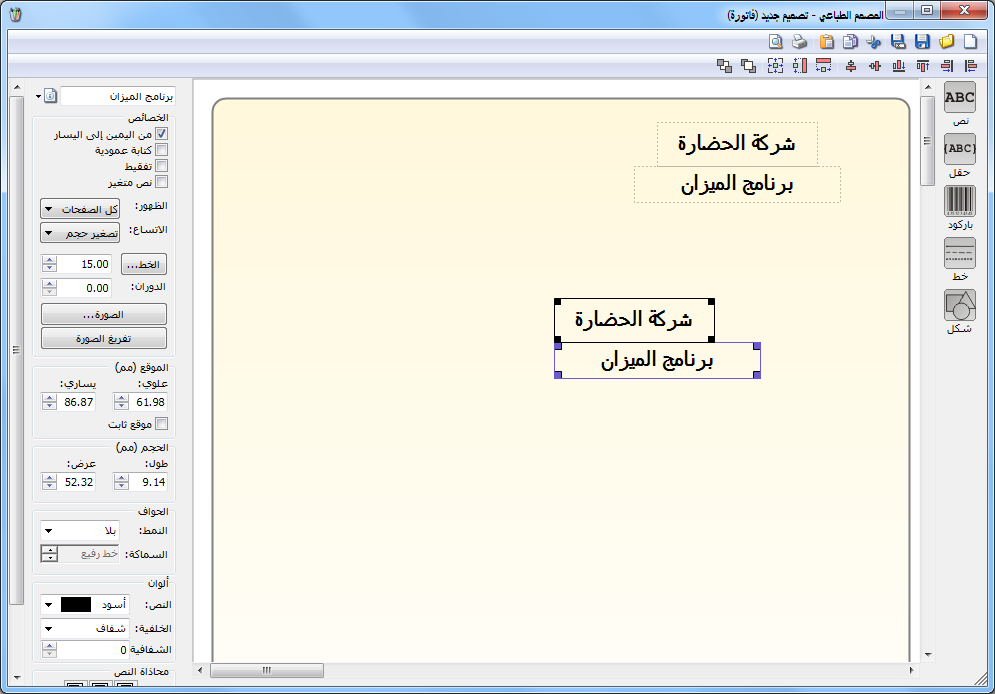
The top toolbar controls the positions of text, fields, barcodes, lines and shapes. With one element selected, it positions that element within the layout. With multiple elements selected, it aligns them relative to each other. The following illustrations show both cases.
.
Design a Barcode Label: #
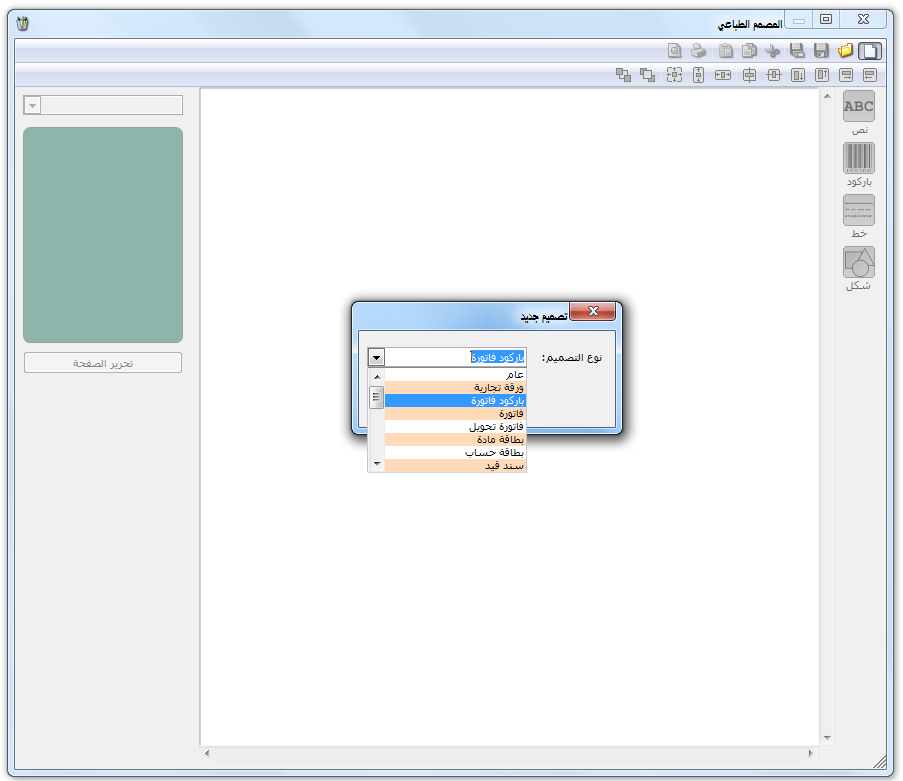
In Print Designer, click New, select Invoice Barcode and click OK, as shown below.
.
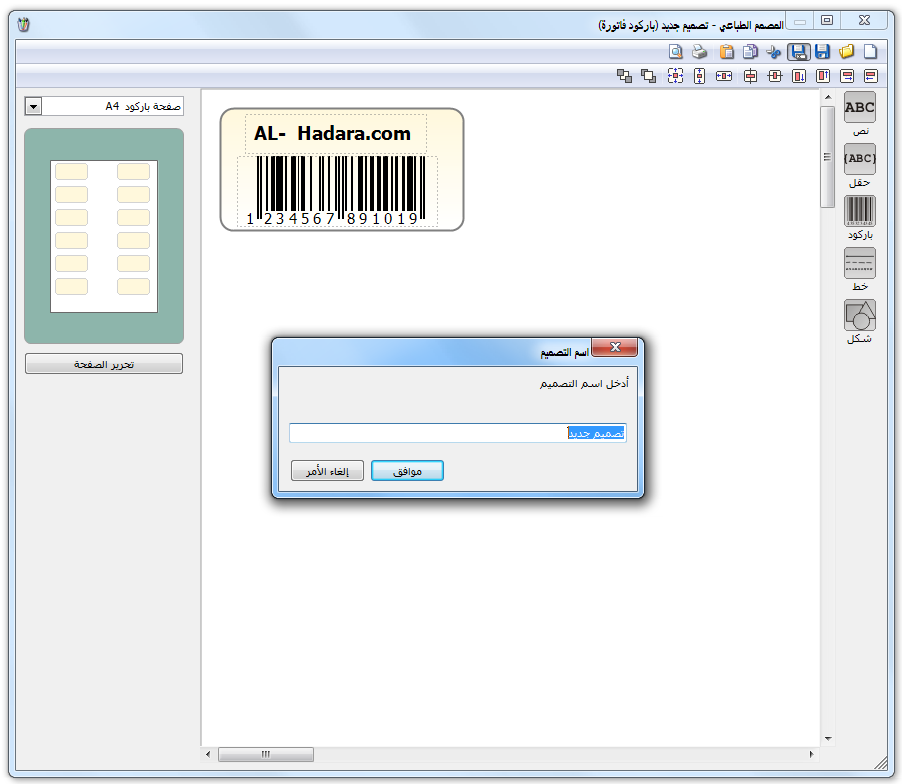
A default label appears. Click Edit Page and set the labels per page, label dimensions, gaps and printer margins. Save the page settings, return to the design, insert the required barcode field and click Convert to Barcode. Add other details such as Item Name or Company Name, then save the design under a suitable name, such as Invoice Barcode. The following illustration shows the process.
.
Note:
Use Field to insert one of the following barcode data fields:
First Unit Barcode: The barcode assigned to the first unit on the item card’s Units tab.
Second Unit Barcode: The barcode assigned to the second unit on the Units tab.
Third Unit Barcode: The barcode assigned to the third unit on the Units tab.
Barcode by Unit: Print the barcode for the unit used in the invoice, whether first, second or third.
Barcode According to Schema: #
Print a barcode for invoice units using the schema defined under Items and Barcode Schema, linked to the item through Units and Barcode Schema in its card.
A barcode inserted using the Barcode button is fixed and is not linked to item cards or the data-driven barcode fields above.
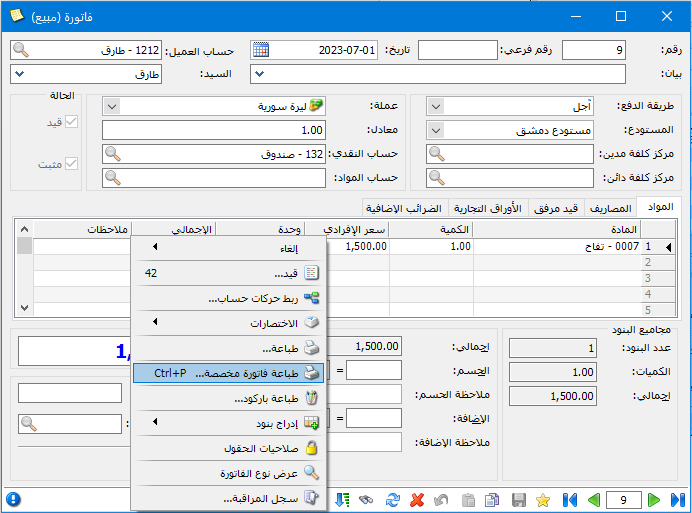
To print an invoice or barcode using an existing layout, open the invoice and select Operations, then Print Barcode or Print Custom Invoice, as illustrated below.
.
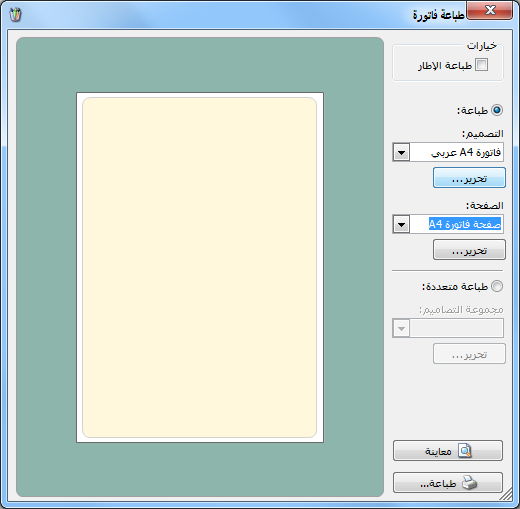
Select the design and page layout in the following window, then click Print. The same approach applies to commercial papers, POS receipts and other supported records.
.


