


Permissions are essential in accounting software, especially when several people use the same database. Give each user an individual account, password and defined permissions so that:
- The user cannot perform database operations outside their permissions.
- The user cannot alter another user’s work without authorization.
- The user cannot view transactions classified as confidential for their access level.
The following sections explain how to define users and configure permissions:
1. User Management: #
Open Permissions / User Management to define users for the company database. The following window appears:
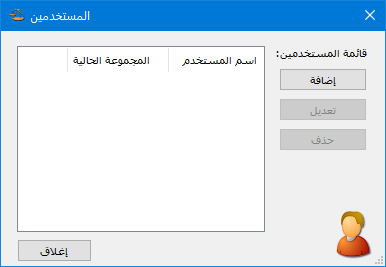
.
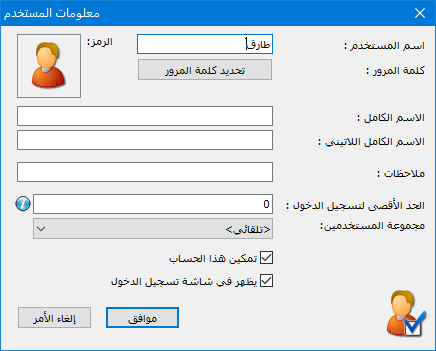
Click Add to create a new user. The following window contains these fields:
User Name: #
Enter the username, such as Tareq.
.
Password: #
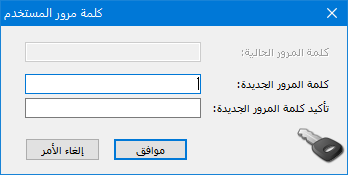
Click Set Password. In the password window, enter the old password if applicable, then enter and confirm the new password and click OK.
.
Maximum Concurrent Logins: #
Set the maximum number of simultaneous logins allowed for this username.
Password Validity Period: #
Set how long the password may be used before it must be changed.
User Group: #
Select the group to which this user belongs if users are organized into groups.
Enable This Account: #
Disable this option to prevent the user from signing in to the database.
Show on the Login Screen: #
Disable this option to hide the username from the list displayed when signing in to the database.
2-User Groups: #
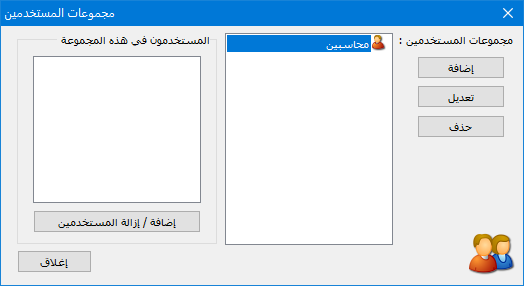
User groups let you configure permissions once for several users rather than separately for each user. Group users according to their required permissions: users in the same group share the group permission settings. Open Permissions / User Groups to create groups, as shown above:
Click Add to create a user group in the following window:
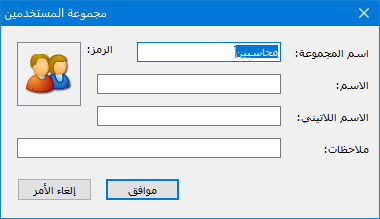
.
To assign users to an existing group, click Add/Remove Users. Select a username on the left and click Add to include that user in the group, as shown:
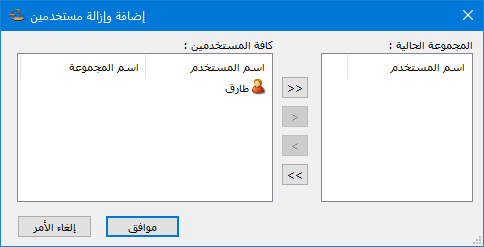
.
3-Set Permissions: #
Open Permissions / Set Permissions and select the user or group to configure. By default, the permission tree is grouped by permission items.
The following examples illustrate how to configure permissions.:
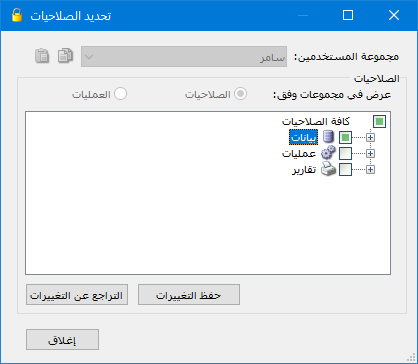
.
Example One: #
A user needs permission to perform all operations and view all database records, transactions and reports:
Click the empty checkbox beside All Permissions. Green checks appear throughout the tree, granting the available permissions, as shown below::
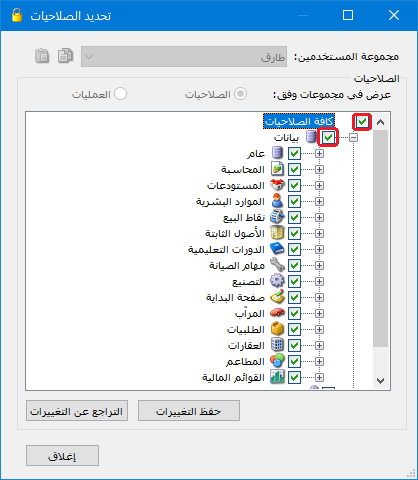
.
Note:
A newly defined user with full permissions still cannot perform these two administrator-only operations: Delete the Database, and Roll Forward the Database. These operations are reserved for the System Administrator, who alone is authorized to perform them.
Example Two: #
A user should perform purchases and sales only:
In Set Permissions, open Data / Invoices and enable the required permissions for Purchase and Sales invoices. Also grant item viewing permission so the user can insert items, and account viewing permission so they can select a customer account. The following image shows the available invoices:
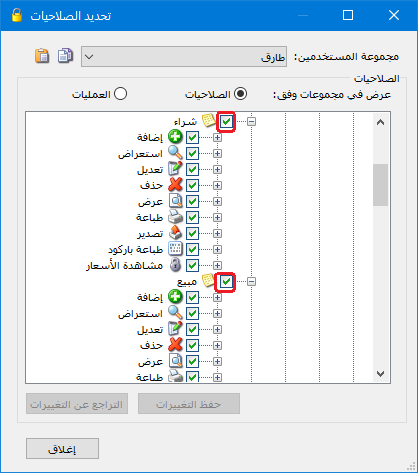
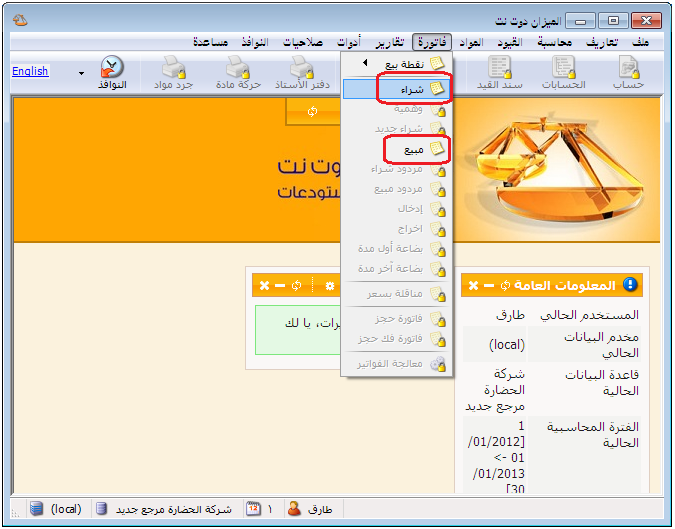
.
When this user signs in, other menus are unavailable while Purchase and Sales invoices remain accessible, as shown below::
Example Three: #
A user may create purchase invoices at every confidentiality level and browse only invoices classified as General. They may not edit, delete, preview, print, print barcodes or export existing invoices.
In Set Permissions, open Data / Invoices. Enable Add for Purchase invoices at all confidentiality levels, and enable View only for the General level, as shown below:
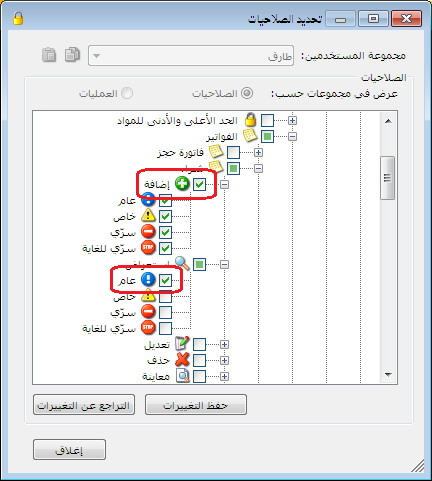
.
On returning to the purchase invoice screen, Add New Record is enabled. Navigation buttons allow browsing existing General invoices, but their fields are read-only because the user cannot edit them. Printing is also unavailable. The following image illustrates this:
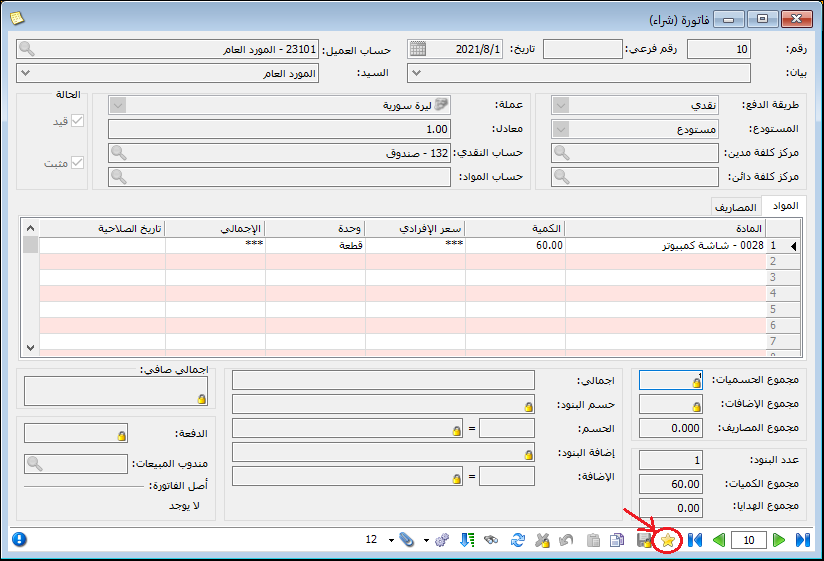
.
Example Four: #
A user should access all operations and accounts except selected confidential accounts, which must be hidden from the account tree and reports:
In Set Permissions, open Data / Accounts. Enable Add fully, but enable View, Edit and Delete only for General and Private confidentiality levels. In this example, set the customer Hisham’s account to Confidential, as shown below:
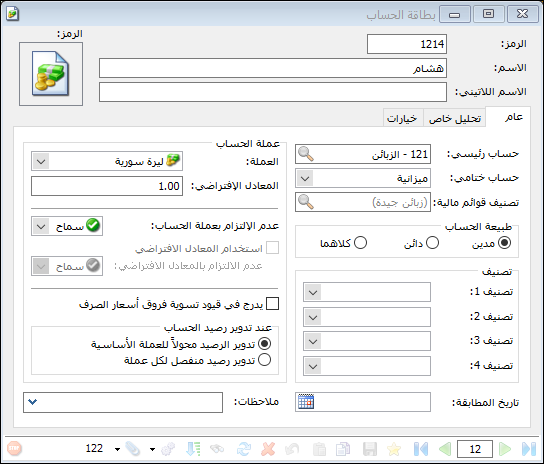
.
The user can no longer see Hisham’s account in the Chart of Accounts, as shown below:
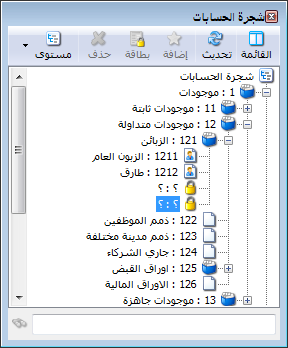
.
If the user requests a customer trial balance, Hisham’s account is also excluded from the report, as shown below:
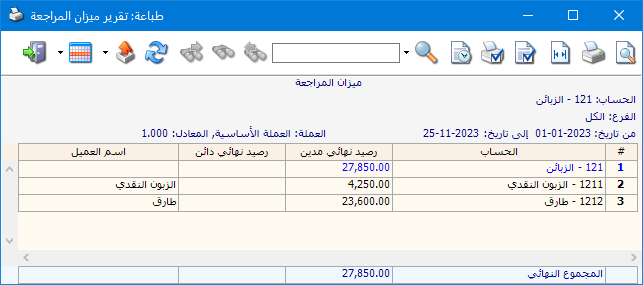
.
Note: #
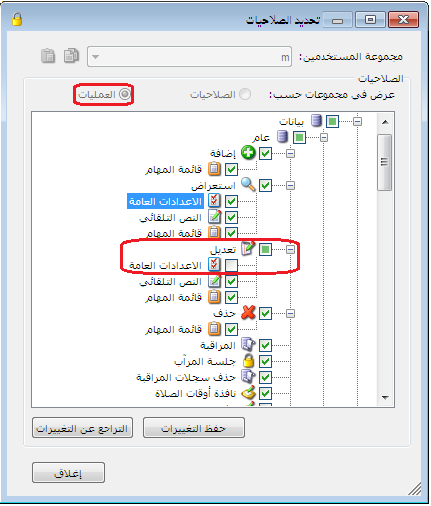
You can group the permission tree by Operations instead of permission items. This organizes permissions around actions such as Add, View, Edit and Delete.
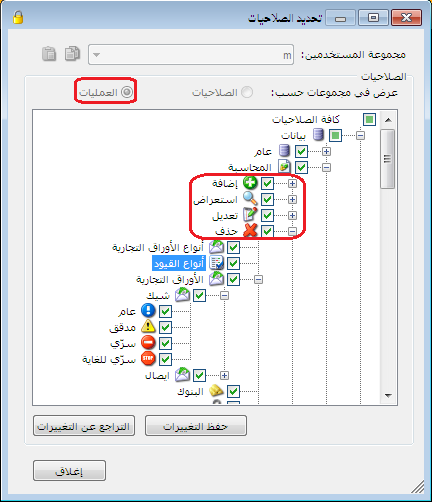
.
Example:
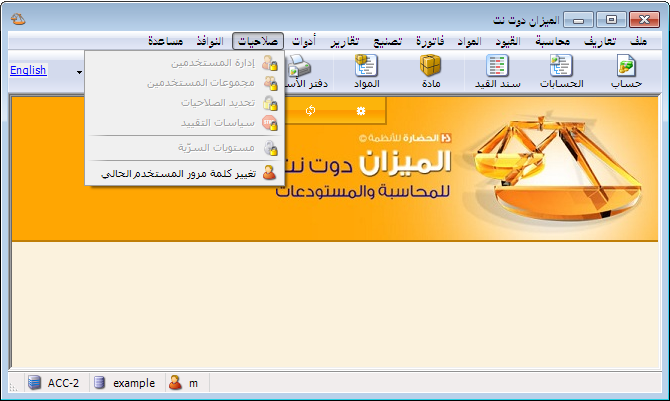
To prevent a user from modifying program settings, open Set Permissions / Operations / Data / General / Edit and disable General Settings. The user will then be unable to change those settings, as shown below:
.
Important Note:
User and Permission Management is itself a permission, found under All Permissions / Operations / General / User and Permission Management. Do not grant it to users who should not change their own or other users’ permissions. It is disabled by default for a user.
The screen after applying the preceding change:
.


