


1. The Purpose of a Barcode Schema #
A barcode identifies an item without selecting it manually by code, name or another attribute. A barcode scanner reads the code and inserts the item into an invoice automatically. There are two main barcode types:
Simple Barcode: #
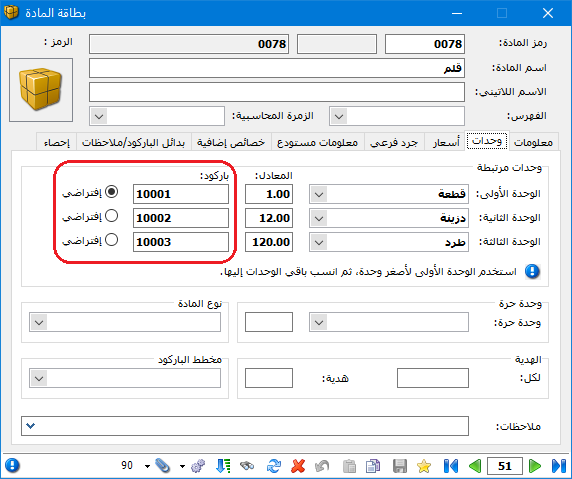
This only inserts the item into the invoice. It is usually entered on the Units tab of the item card for the first, second or third unit, as shown below.
.
Composite Barcode (Barcode Schema): #
This inserts the item along with additional information, such as color, size, weight or value. A single barcode can contain multiple attributes, such as both color and size.
Consider the following example to understand how to define a schema.
Suppose a company sells cotton shirts with the same cost but different colors and sizes. It wants to print a barcode containing each shirt’s color and size, attach it to the shirt and scan it when receiving or selling the item. Color and size are then entered automatically into the invoice. Management also wants to review remaining cotton shirt inventory by color, size or both.
Define and use a barcode schema containing color and size with the following steps:
2. Define a Barcode Schema #
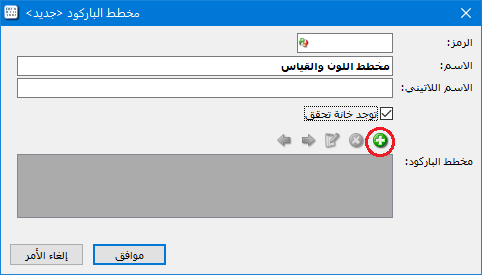
Open Items and select Barcode Schema. Enter a name, such as Color and Size Schema, then click Add to add fields to the schema, as shown below.
.
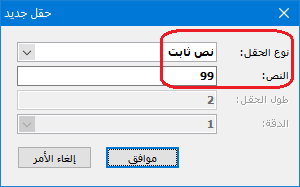
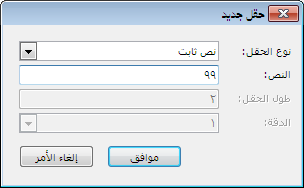
Click Add to open the field window. First add a fixed text prefix to distinguish this schema from others, such as 99, as illustrated below.
.
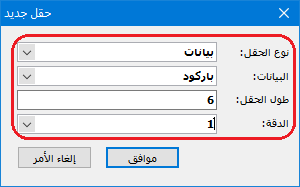
Then add a Data field for Barcode with a field length of six digits. The barcode in the item card must contain no more than six digits, as shown below.
.
Add two more Data fields, Color and Size, each with a length of two digits, as illustrated below.
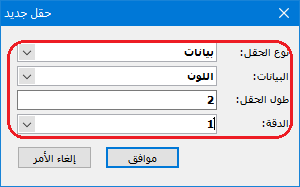
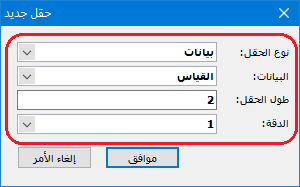
.
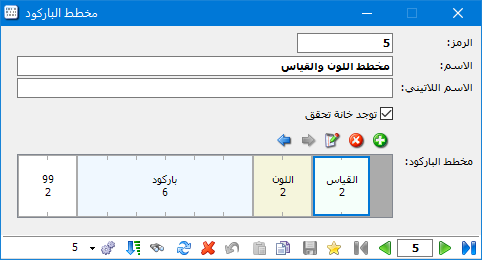
The schema now contains twelve digits; a thirteenth check digit is generated automatically when printing. If Has Check Digit is enabled in Barcode Schema, Customer Statement and Detailed Invoice Movements display the full thirteen-digit barcode as printed. The completed schema is shown below.
3. Define the Item, Its Barcode and Colors, and Link the Schema #
Create an item card for Cotton Shirt, enter a six-digit barcode for its first unit and link the Color and Size Schema defined earlier, as illustrated below.
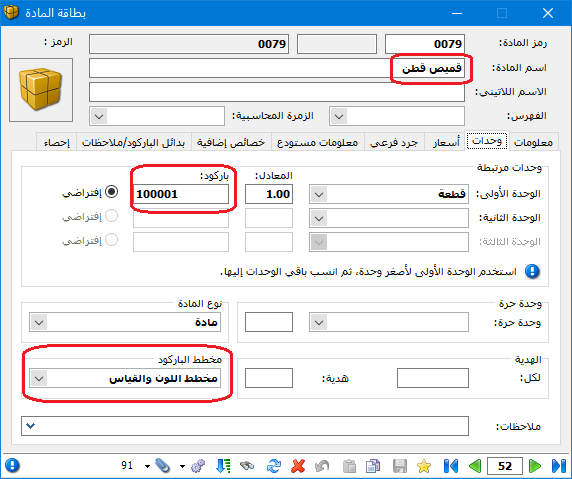
.
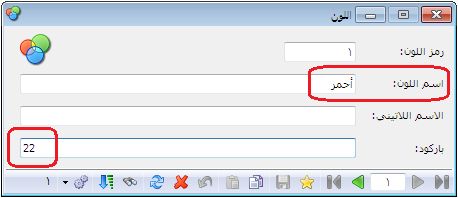
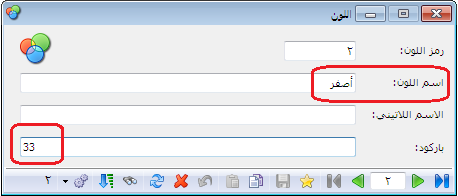
Define colors and sizes through Items and Item Reference Data. In Color, enter the color name and its barcode number in the corresponding fields, as shown below.
Important Note:
If no number is entered in Barcode, the color code is used as its barcode.
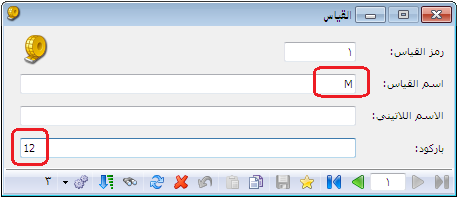
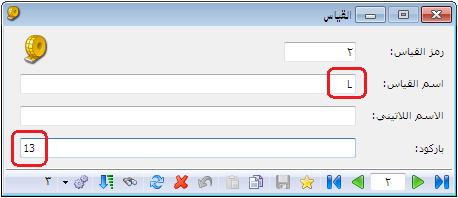
Define item sizes in the same way, as illustrated below.
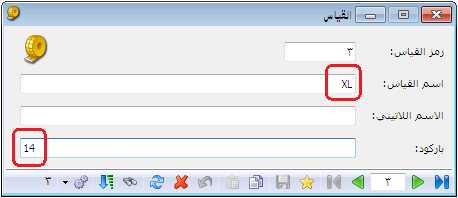
.
4. Print the Barcode Schema and Use It in Invoices #
After defining the item, linking its Color and Size Schema, and defining its colors and sizes, enter the cotton shirts into a purchase invoice with separate lines for each color and size. Then print barcodes using the schema for the items in that invoice.
To enter color and size details, open Definitions, select Invoice Types and enable the Color and Size columns under Columns, as shown below.
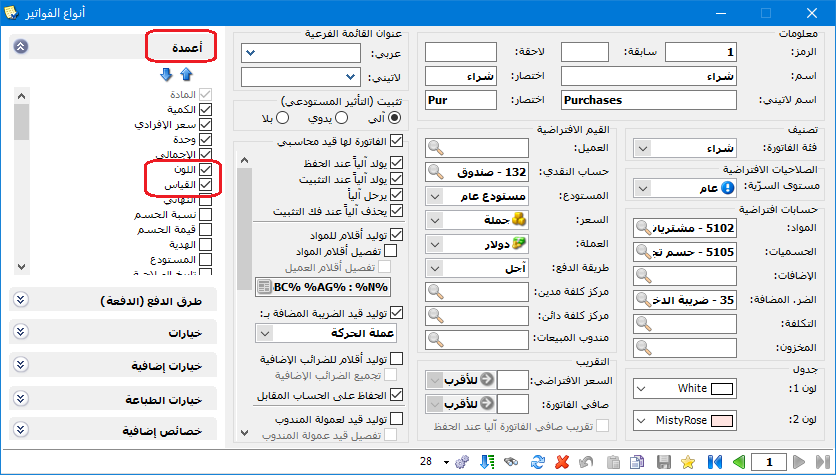
.
Enter the items in the purchase invoice with separate color and size details, as illustrated below.
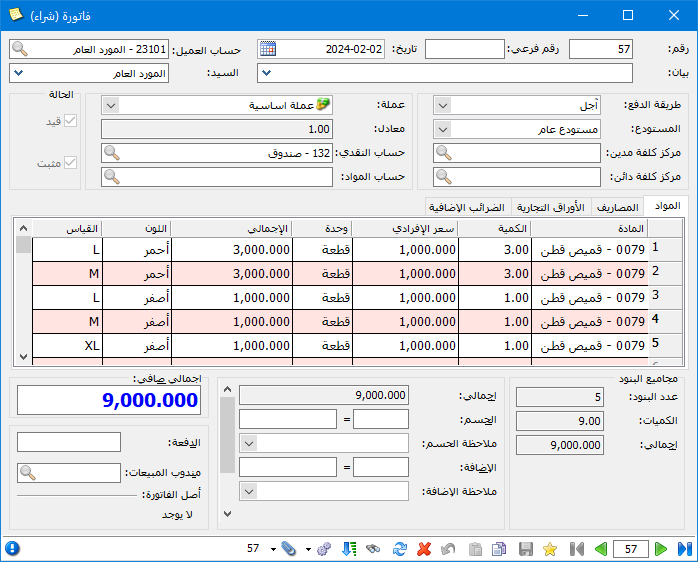
.
Print one barcode for each purchased shirt, including its color and size. In the invoice, open Operations and select Print Barcode, as shown below.
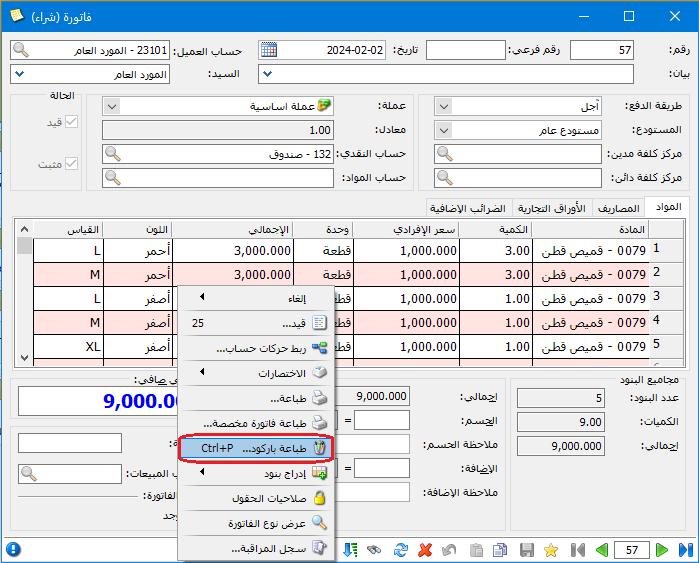
.
Stage: Configure Printing #
The following window lets you select the barcode design and a page layout matching your barcode label dimensions.
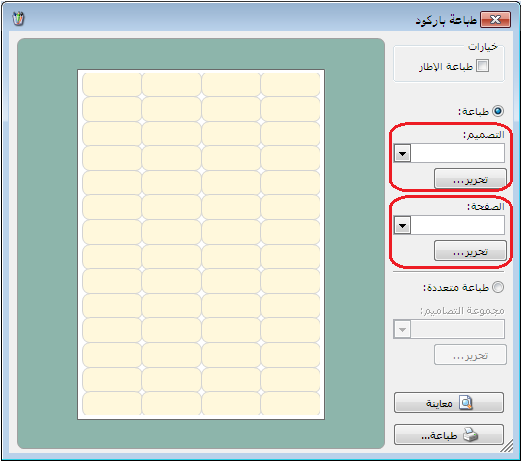
.
First click Edit for the page layout to specify the dimensions and settings of your label sheet. Page design is explained in Print Designer. Then click Save, as shown below.
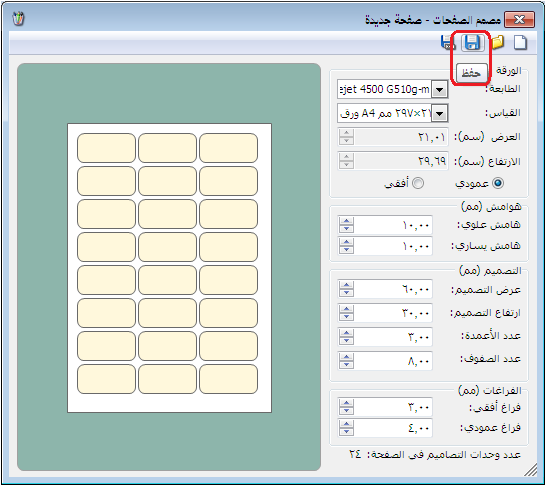
.
Enter a name for the page layout in the Save window, as illustrated below.
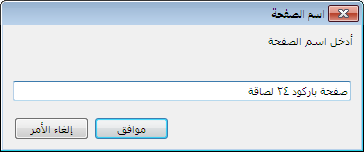
Return to the window with the two Edit buttons and click Edit for the label design. In the designer, click New to display one label where the required fields can be placed.
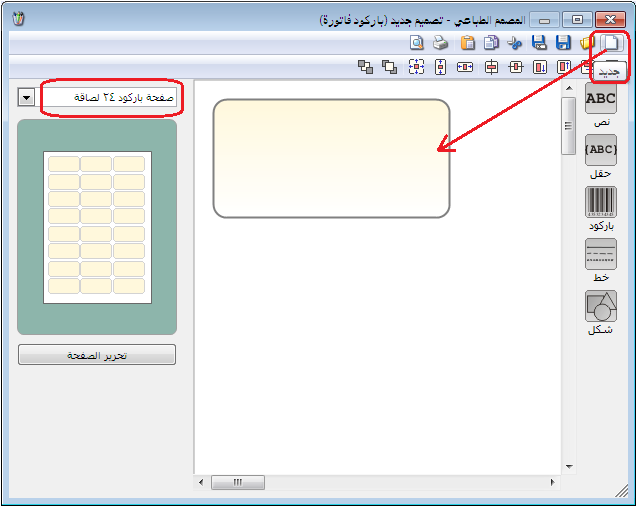
.
The yellow area represents one label. Click Field, select fields such as Item Name, Price and Barcode According to Schema, then click OK, as illustrated below.
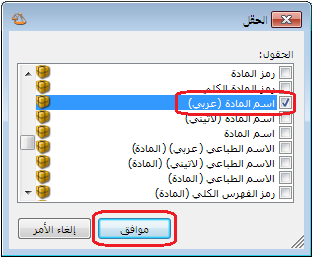
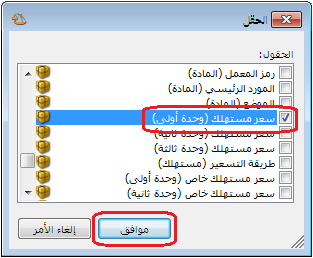
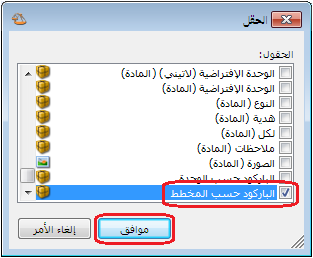
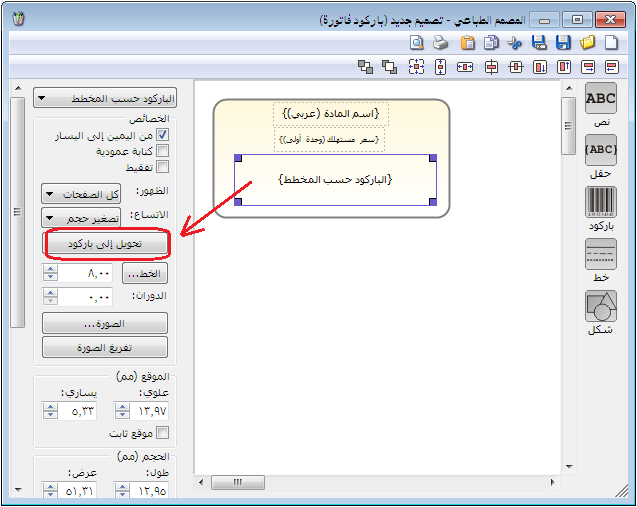
Select Barcode According to Schema and click Convert to Barcode, as shown below.
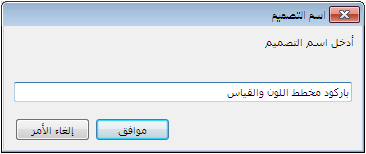
Click Save at the top of the designer and enter a name for the label design in the following window.
Printing Stage #
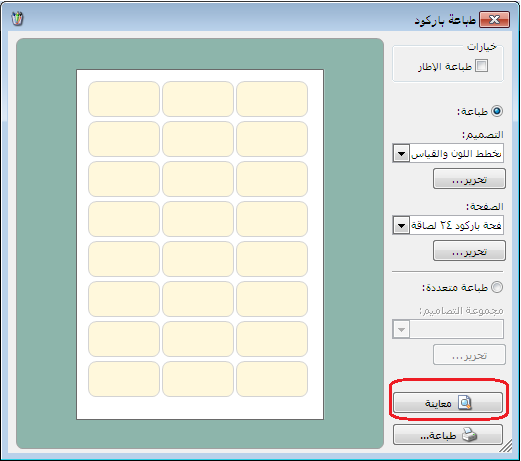
Close Print Designer and return to the window with the two Edit buttons. The barcode design and page layout are now available. Click Preview to review the barcodes before printing.
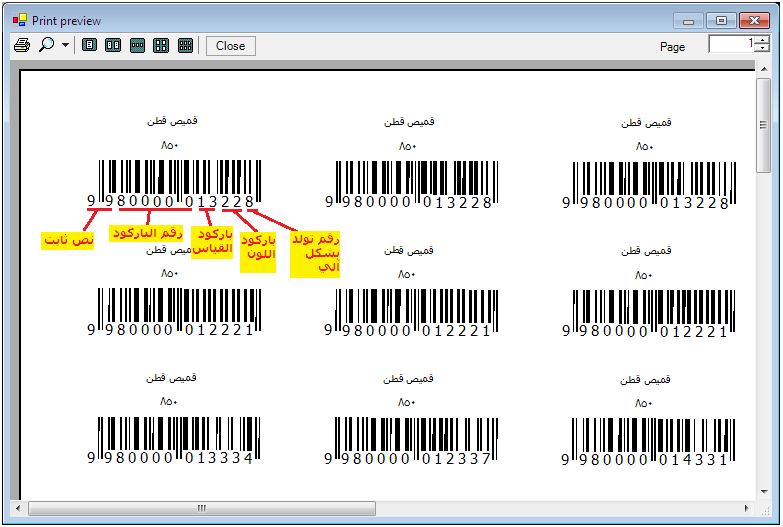
The illustration above explains the barcode components. Attach the labels carefully to the products. Scanning a barcode in a purchase, sales or other invoice automatically inserts the item and its price, quantity, color and size. The Color and Size fields must be enabled in the invoice, as described earlier.
5. Request an Inventory Report Using Barcode Schema Details #
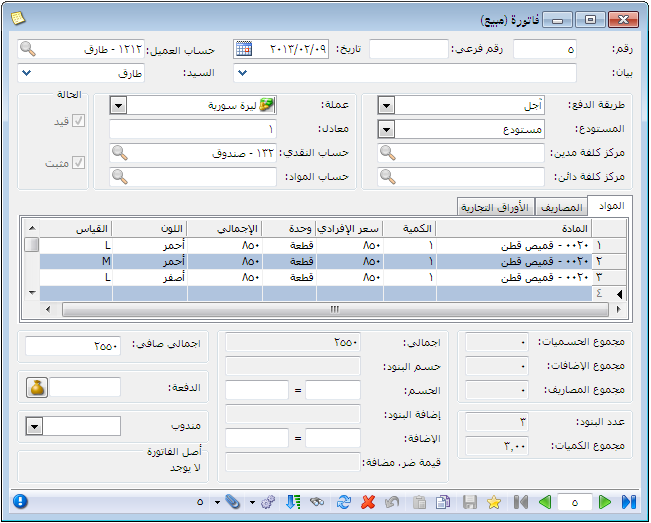
After receiving items, printing their barcode schemas and using them to issue stock, request Item Inventory or Horizontal Item Inventory with a breakdown by color, size, both, or neither. For example, assume the following purchase invoice is entered.
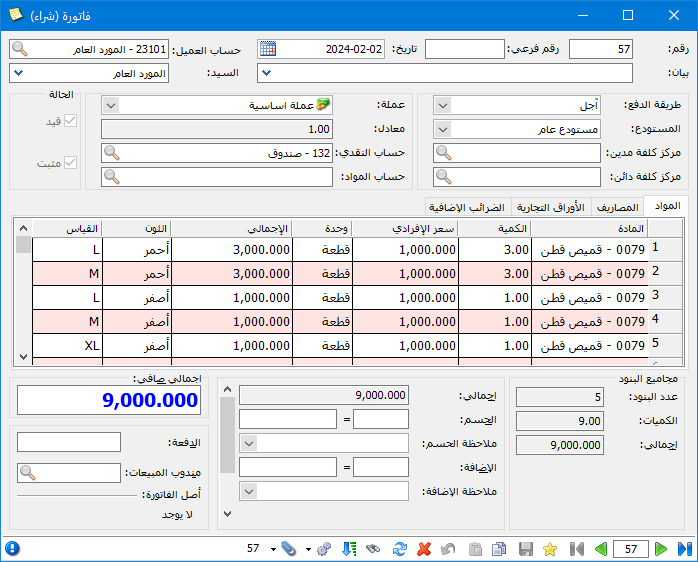
.
Then suppose the following sales invoice is recorded.
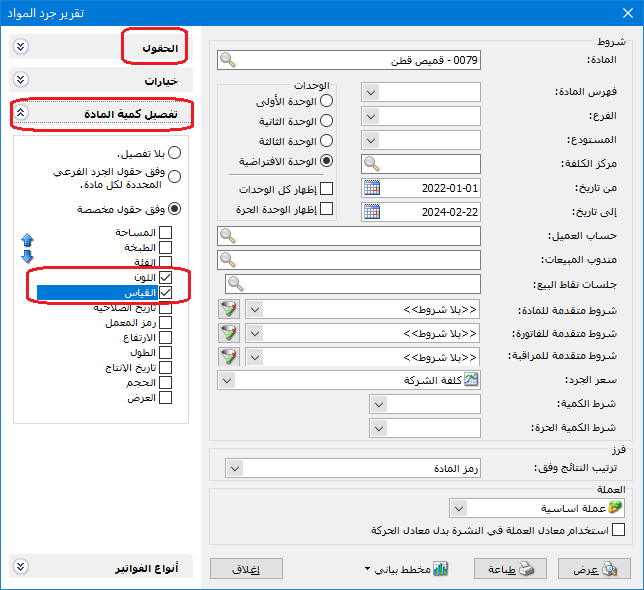
To review remaining warehouse inventory by color and size, enable both under Break Down By and show the Color and Size fields, as illustrated below.
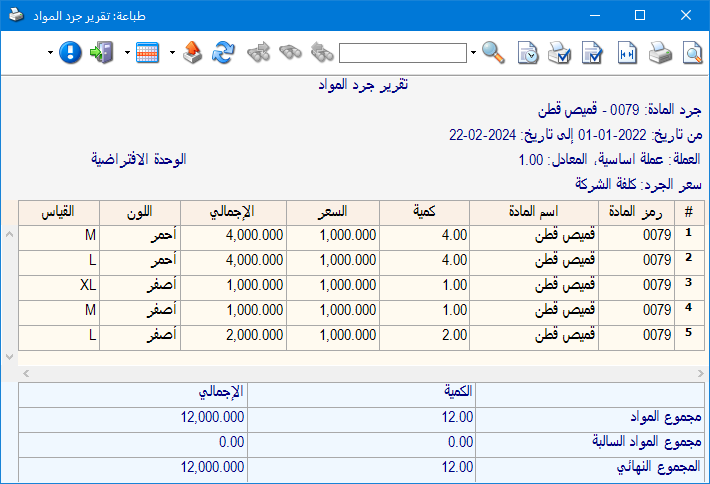
The Item Inventory report then shows remaining units by color and size, as illustrated below.
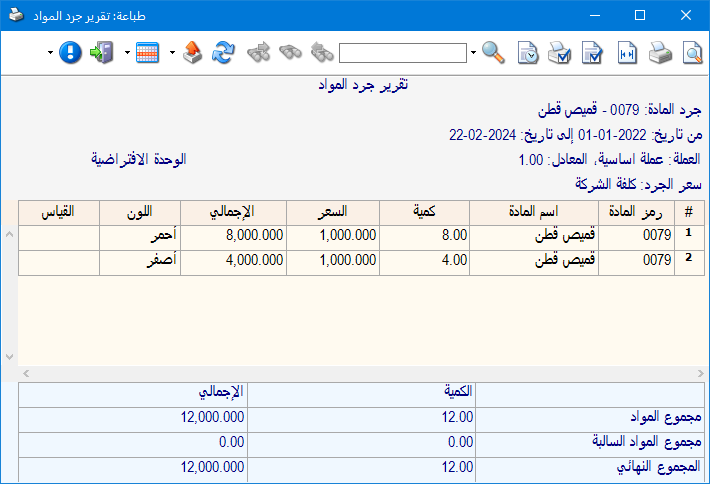
Alternatively, select a breakdown by Color only to display the following report.
Or request the report without a breakdown, as shown below.
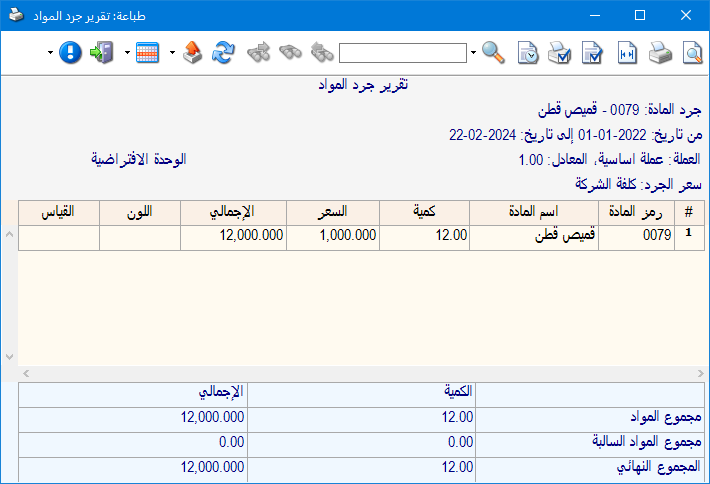
6- Schema Barcode for Weight, Total Value and Expiry Date: #
Some barcode schemas are printed externally rather than by the program. Define their structure so Al Mizan can interpret the encoded information when scanned. Common examples contain an item’s weight or total value and are used in supermarkets and food shops, where a weighing scale weighs an item and prints its barcode label. Identify the fields in the printed barcode, then enter them when defining the schema.
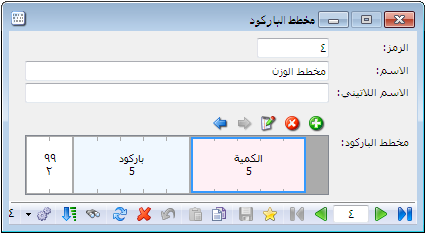
For example, suppose a supermarket scale prints a barcode with a fixed prefix of 99, a five-digit item barcode and a five-digit weight field whose final two digits represent decimal places. Define the schema as illustrated below.
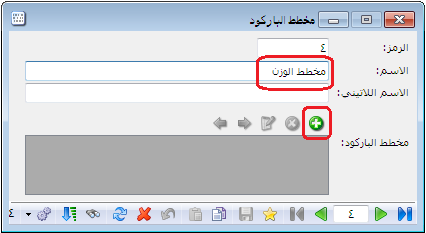
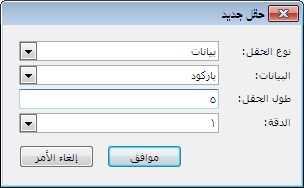
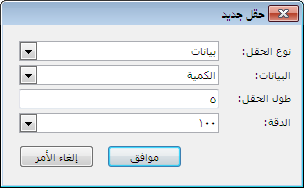
Precision is set to 100 in this example, meaning the last two of the five weight or quantity digits are decimal places. A precision of 1000 would use three decimal places.
The resulting barcode schema is shown below.
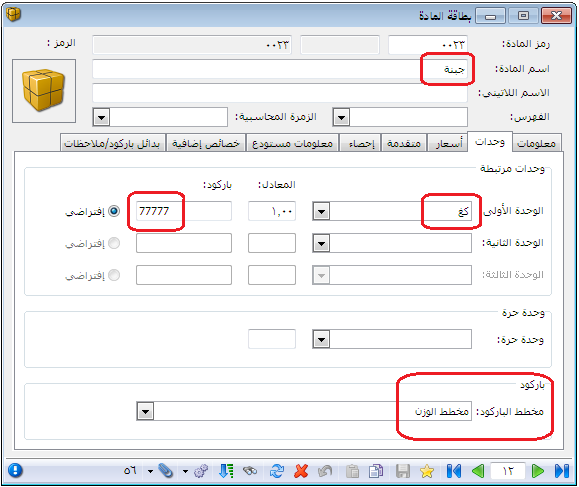
Link the schema to the item card, as illustrated below.
Suppose the scale prints the following barcode for cheese weighing 12.5 kilograms.
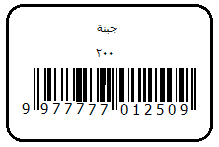
Scanning this barcode in the invoice automatically inserts Cheese with a weight of 12.5.
Similarly, you can define a barcode containing the item’s total value, as shown below.
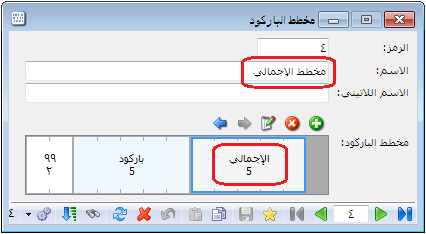
You can also define a barcode containing the item’s expiry date, a format commonly used in pharmacies, as illustrated below.
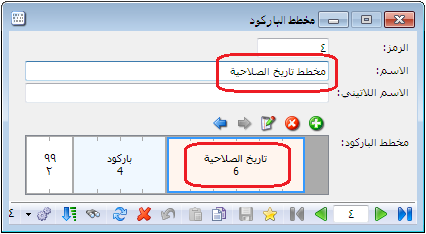
.


